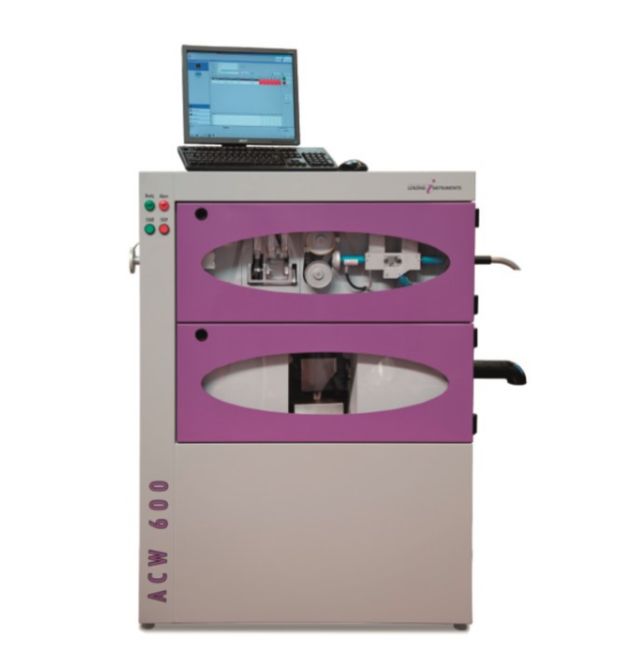
Modular and versatile design: Used either solely as Automatic Cut and Weigh unit; ACW 600, for titer (dtex/denier) measurement or together with the DVA unit for additional Denier Variation Analysis within one and the same test run. Special version available for titer determination of bulky yarns; ACW 600 BCF.
At-line application
ACW 600/DVA is placed directly in the production, close to the spinning position. This together with the high-speed testing Test principle means timely reactions to minor quality; hence less downgraded material with cost savings as a result.
Easy results evaluation
Intuitive and easy analysis of measurement results. Thorough problem analysis with special key figures: No need for expert personnel.
Highly automated handling
ACW 600/DVA features automatic yarn string-up and sample removal. An even higher automatization degree can be achieved if ACW 600/DVA is used together with the optional SESS Sequential End Sampling System: With SESS, up to 24 positions are handled centrally and automatically for efficient sample feeding without any need for operator interference.
Test method
For determination of titer (dtex, den), a pre-set length of yarn is automatically cut and forwarded to an integrated balance for weighing. Yarn evenness is determined by of capacitive sensors. Standardized according to ASTM D 6587, ASTM D 6612.
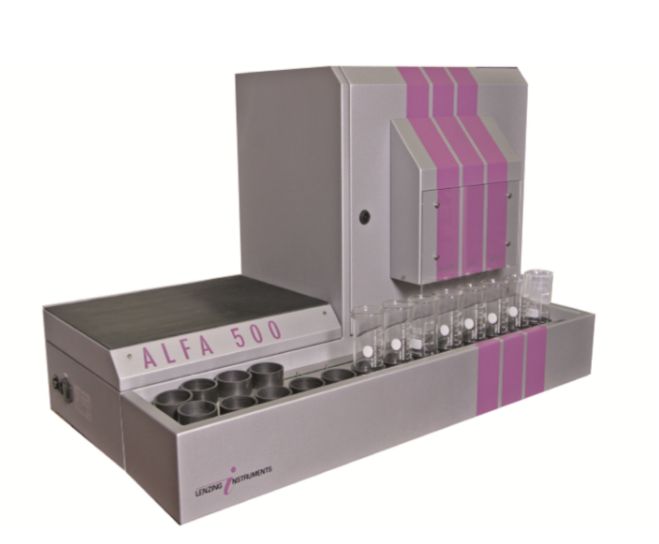
High degree of automation
A completely automatic measurement procedure allows for up to 28 samples to be analysed for spin finish content without any human interference – no expert personnel needed, reliable and objective measurement results.
Timesaving
After weighing of the samples, the operator is free to carry out any other task since the spin finish analysis is carried out automatically with no further need for operator handling. One test run of up to 28 fiber-, filament-, or nonwoven samples takes less than 90 minutes.
Economical
The high automatization degree of ALFA 500 means lower personnel costs. This together with the reduced costs for consumables thanks to the usage of deionized water as a dissolvent make ALFA 500 a cost-saving and economical choice for spin finish determination.
Environmentally friendly
With ALFA 500, spin finish determination is accomplished without the need for hazardous chemicals: Instead, application of hot deionized water as a dissolvent means cost savings since no high-risk material has to be disposed of. Moreover, the compliance with any environmental regulations or sustainability objectives is given.
Test method
Spin finish is determined by means of testing the material for the total carbon content, TC.
The detected TC correlates to a certain spin finish oil content of the tested material (%OPU or %FOY) according to calibration values.
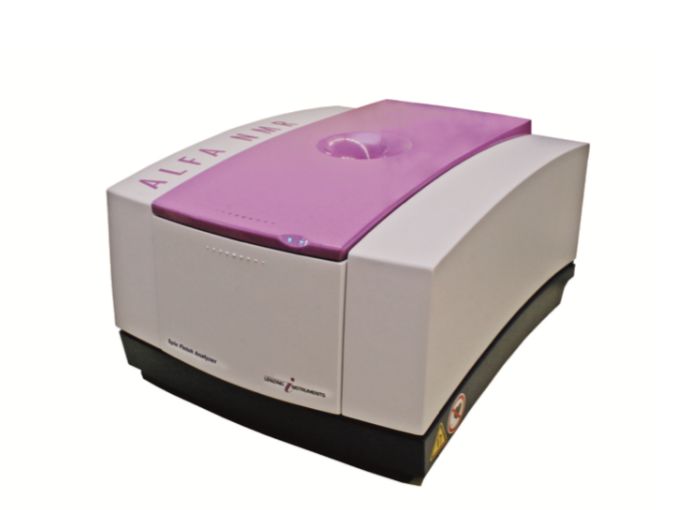
All-purpose instrument
The TD-NMR based technology allows for analysis of any kind of spin finish on filament yarn: monofilament, multifilament or texturized. ALFA NMR is also suitable for determination of the amount of elastomer coatings, so called DIPs, on fibers.
Time-saving spin finish testing
By means of the unbreakable sample tubes, sample loading is performed fast, safe and simple.
Per sample, spin finish analysis is accomplished within two minutes, including sample preparation.
Plug-and-play
ALFA NMR is delivered as a complete unit together with unbreakable sample tubes, calibration transfer- and validation standards and the intuitive software program. Installation is easy and user friendly: The instrument is ready for use within minutes.
Sustainable operation
The solvent-free analysis together with lowest requirements for electricity and low noise properties make ALFA NMR environmentally friendly and, at the same time, it contributes to a safe working environment.
Test method
The measurement of ALFA NMR is based on the technique of Time Domain NMR (Nuclear Magnetic Resonance).
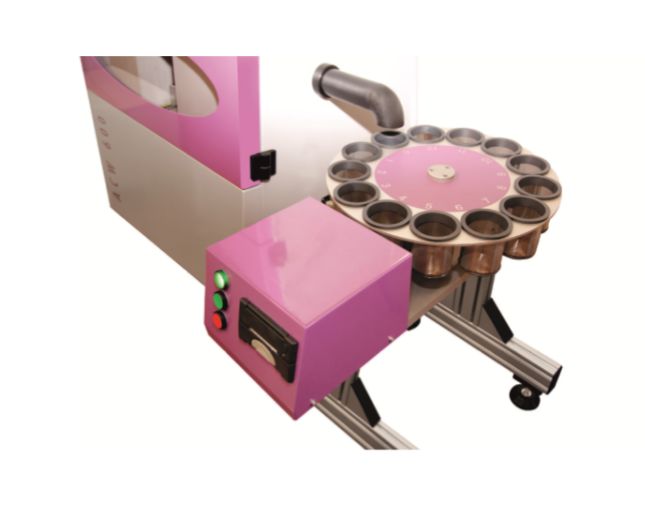
Controlled sampling
In combination with ACW/DVA 600, ASC 12 enables automatic generation of up to 12 filament yarn samples. Since sample identity is automatically assigned, any human errors in regard to sample identification can be avoided. The weight of all collected samples will be identical.
Workload savings
Usage of ASC 12 means that staff is not tied up with sample preparation but is free to carry out other tasks.
Usage with ALFA 500
If ASC 12 is used in combination with the spin finish tester ALFA 500, sample preparations is reduced to an absolute minimum. The automatically generated sample information can directly be used for measurements with for instance ALFA 500.
Sampling method
During the dtex/denier measurement with the filament yarn tester ACW 600/DVA, a yarn sample is automatically prepared and weighed. ASC 12 collects these samples together with the corresponding weight and identification data.
Detailed abrasion information
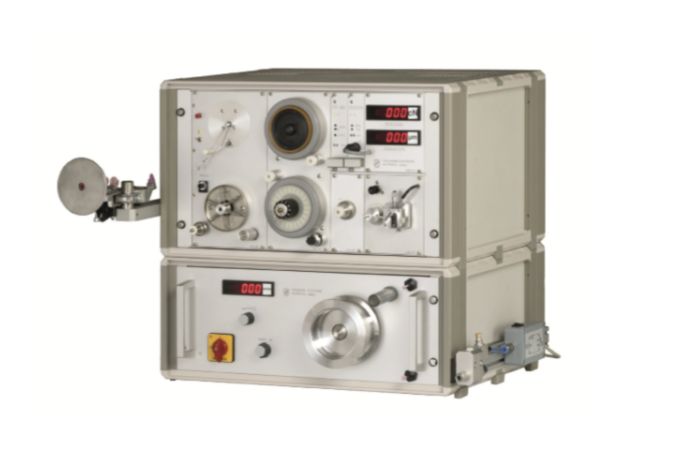
The Abrasion Tester AT 500 determines the abrasive potential of filament yarn accurately and reliably. AT 500 enables feedback both about unintended abrasion as well as of positive abrasion-reducing properties resulting from spin finish oil application.
Wide area of application
Examine how various parameters influence the abrasion properties, e.g. the composition of spin finishes, dyes, agents and additives, the sectional form of the yarn or yarn titer. Use AT 500 for production control, to find out the reason for yarn abrasion, determine the anticipated needle service lives and much more.
Test method
In combination with a yarn take-off unit, the tested yarn is run through a metal plate during a defined period of time. A sensor continuously registers the abrasion of the plate.
AT 500 is offered in cooperation with Honigmann GmbH, Germany.
100% moisture control
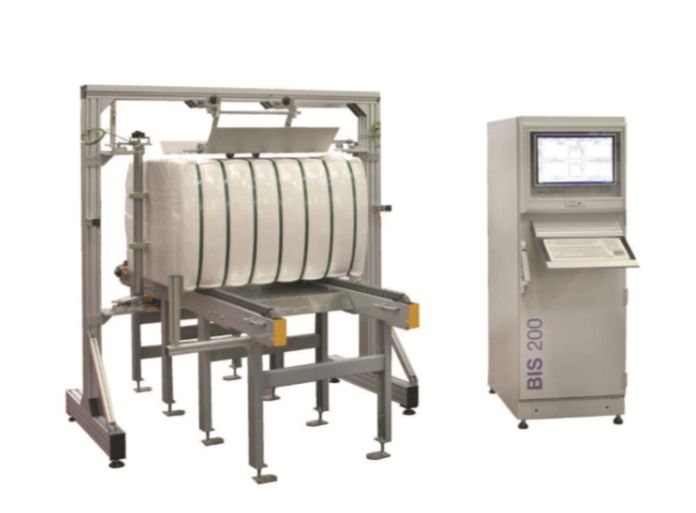
Complete bale analysis including scanning in slices for feedback about the moisture distribution within the bale, wet and dry spot detection and consideration for the bale ageing factor.
Easy handling
In-line monitoring of the moisture content, without any need to stop the fiber bale throughout the measurement. No exact positioning is necessary and the measurement is accomplished in the packed state including packing bands.
Economic
The system enables rapid savings by controlling the ratio between fiber and water content, with an optimized commercial bale weight as a result.
Proven technology
BIS 200 is a well-proven system, characterised by its accuracy and the reproducibility of the measured values.
Inspection method
The fiber bale passes through a measurement gate with capacitive sensors. By consideration of the different dielectric constants of water and the produced fiber material, both the total moisture content as well as its distribution throughout the bale can be determined.
Predict comfort degree
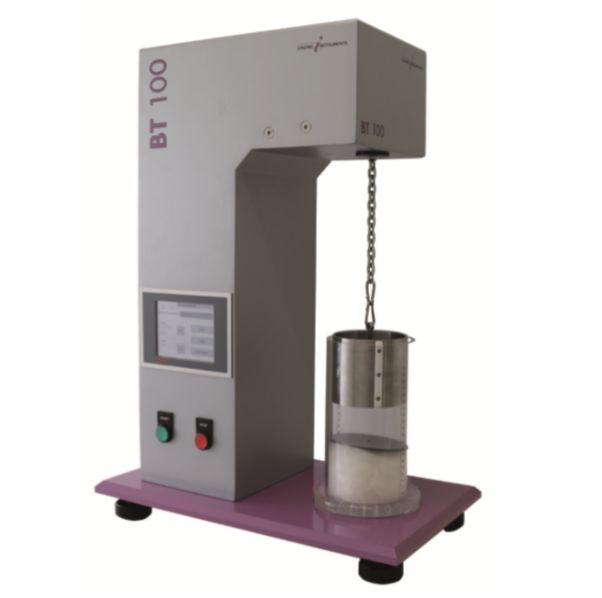
For filling materials such as staple fiber and bulky filament yarns, the Bulk Tester BT 100 gives feedback about comfort properties such as filling power and recovery properties of pillows and similar end products.
Reproducible test results
The measurement procedure involves compression respectively decompression of a bulky fiber or filament sample for a pre-set number of cycles. Objectivity and reproducibility of measurement results is guaranteed by the automatic movement of the compressing weight.
Test method
A loading weight automatically compresses respectively decompresses the sample for a pre-set number of loading cycles. An analysis of the sample height in compressed respectively decompressed condition determines the elastic recovery of the material.
Complete crimp classification
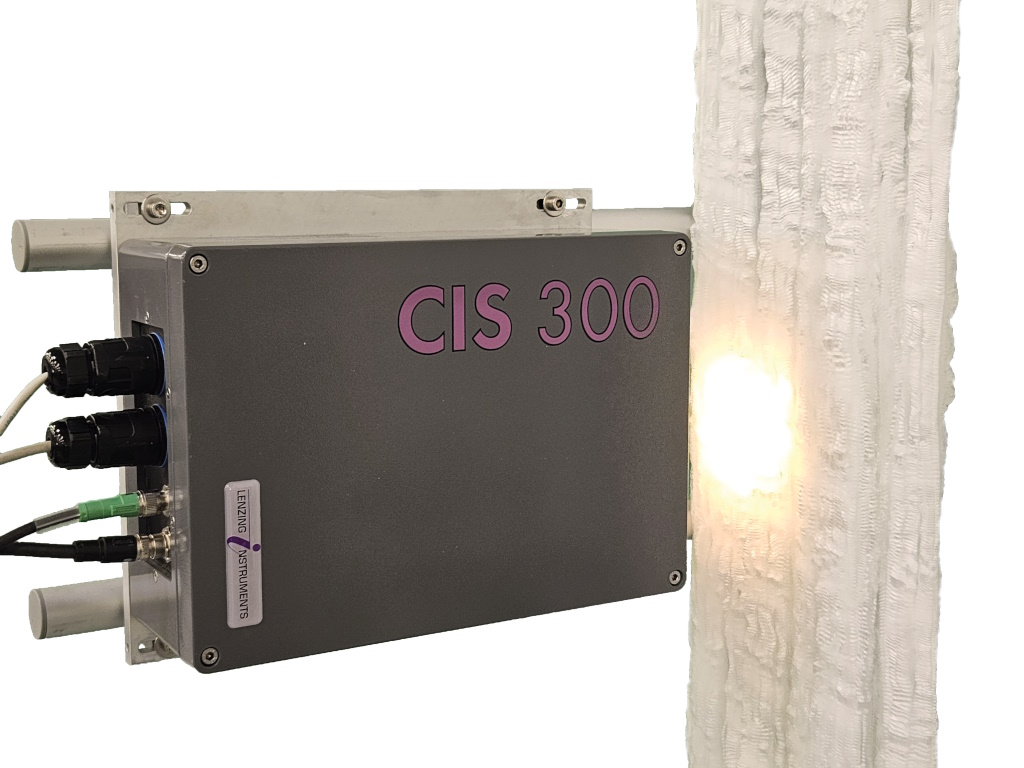
With CIS 300, the fiber tow is analysed for the average crimp count per length unit by means of visual inspection. The crimp is classified into long crimp, micro crimp and edge crimp and feedback is given about the distribution thereof along and across the tow.
100% crimp control
CIS 300 is installed directly in the production area and offers continuous, online measurement of crimp count. The visual inspection technology features a high-degree correlation with results of laboratory measurements. CIS 300 enables 100% production control instead of random sampling, which is the case with laboratory testing.
Suitable for all tow sizes
A choice of either fix mounted or moving cameras enables adaption to various fiber tow widths.
Claim prevention and source tracing
Traceability of faulty product batches.
Product quality changes are immediately recognised.
Less waste and down-graded fibers.
Inspection method:
High resolution cameras in combination with LED light scan the moving tow continuously.
In-depth monitoring
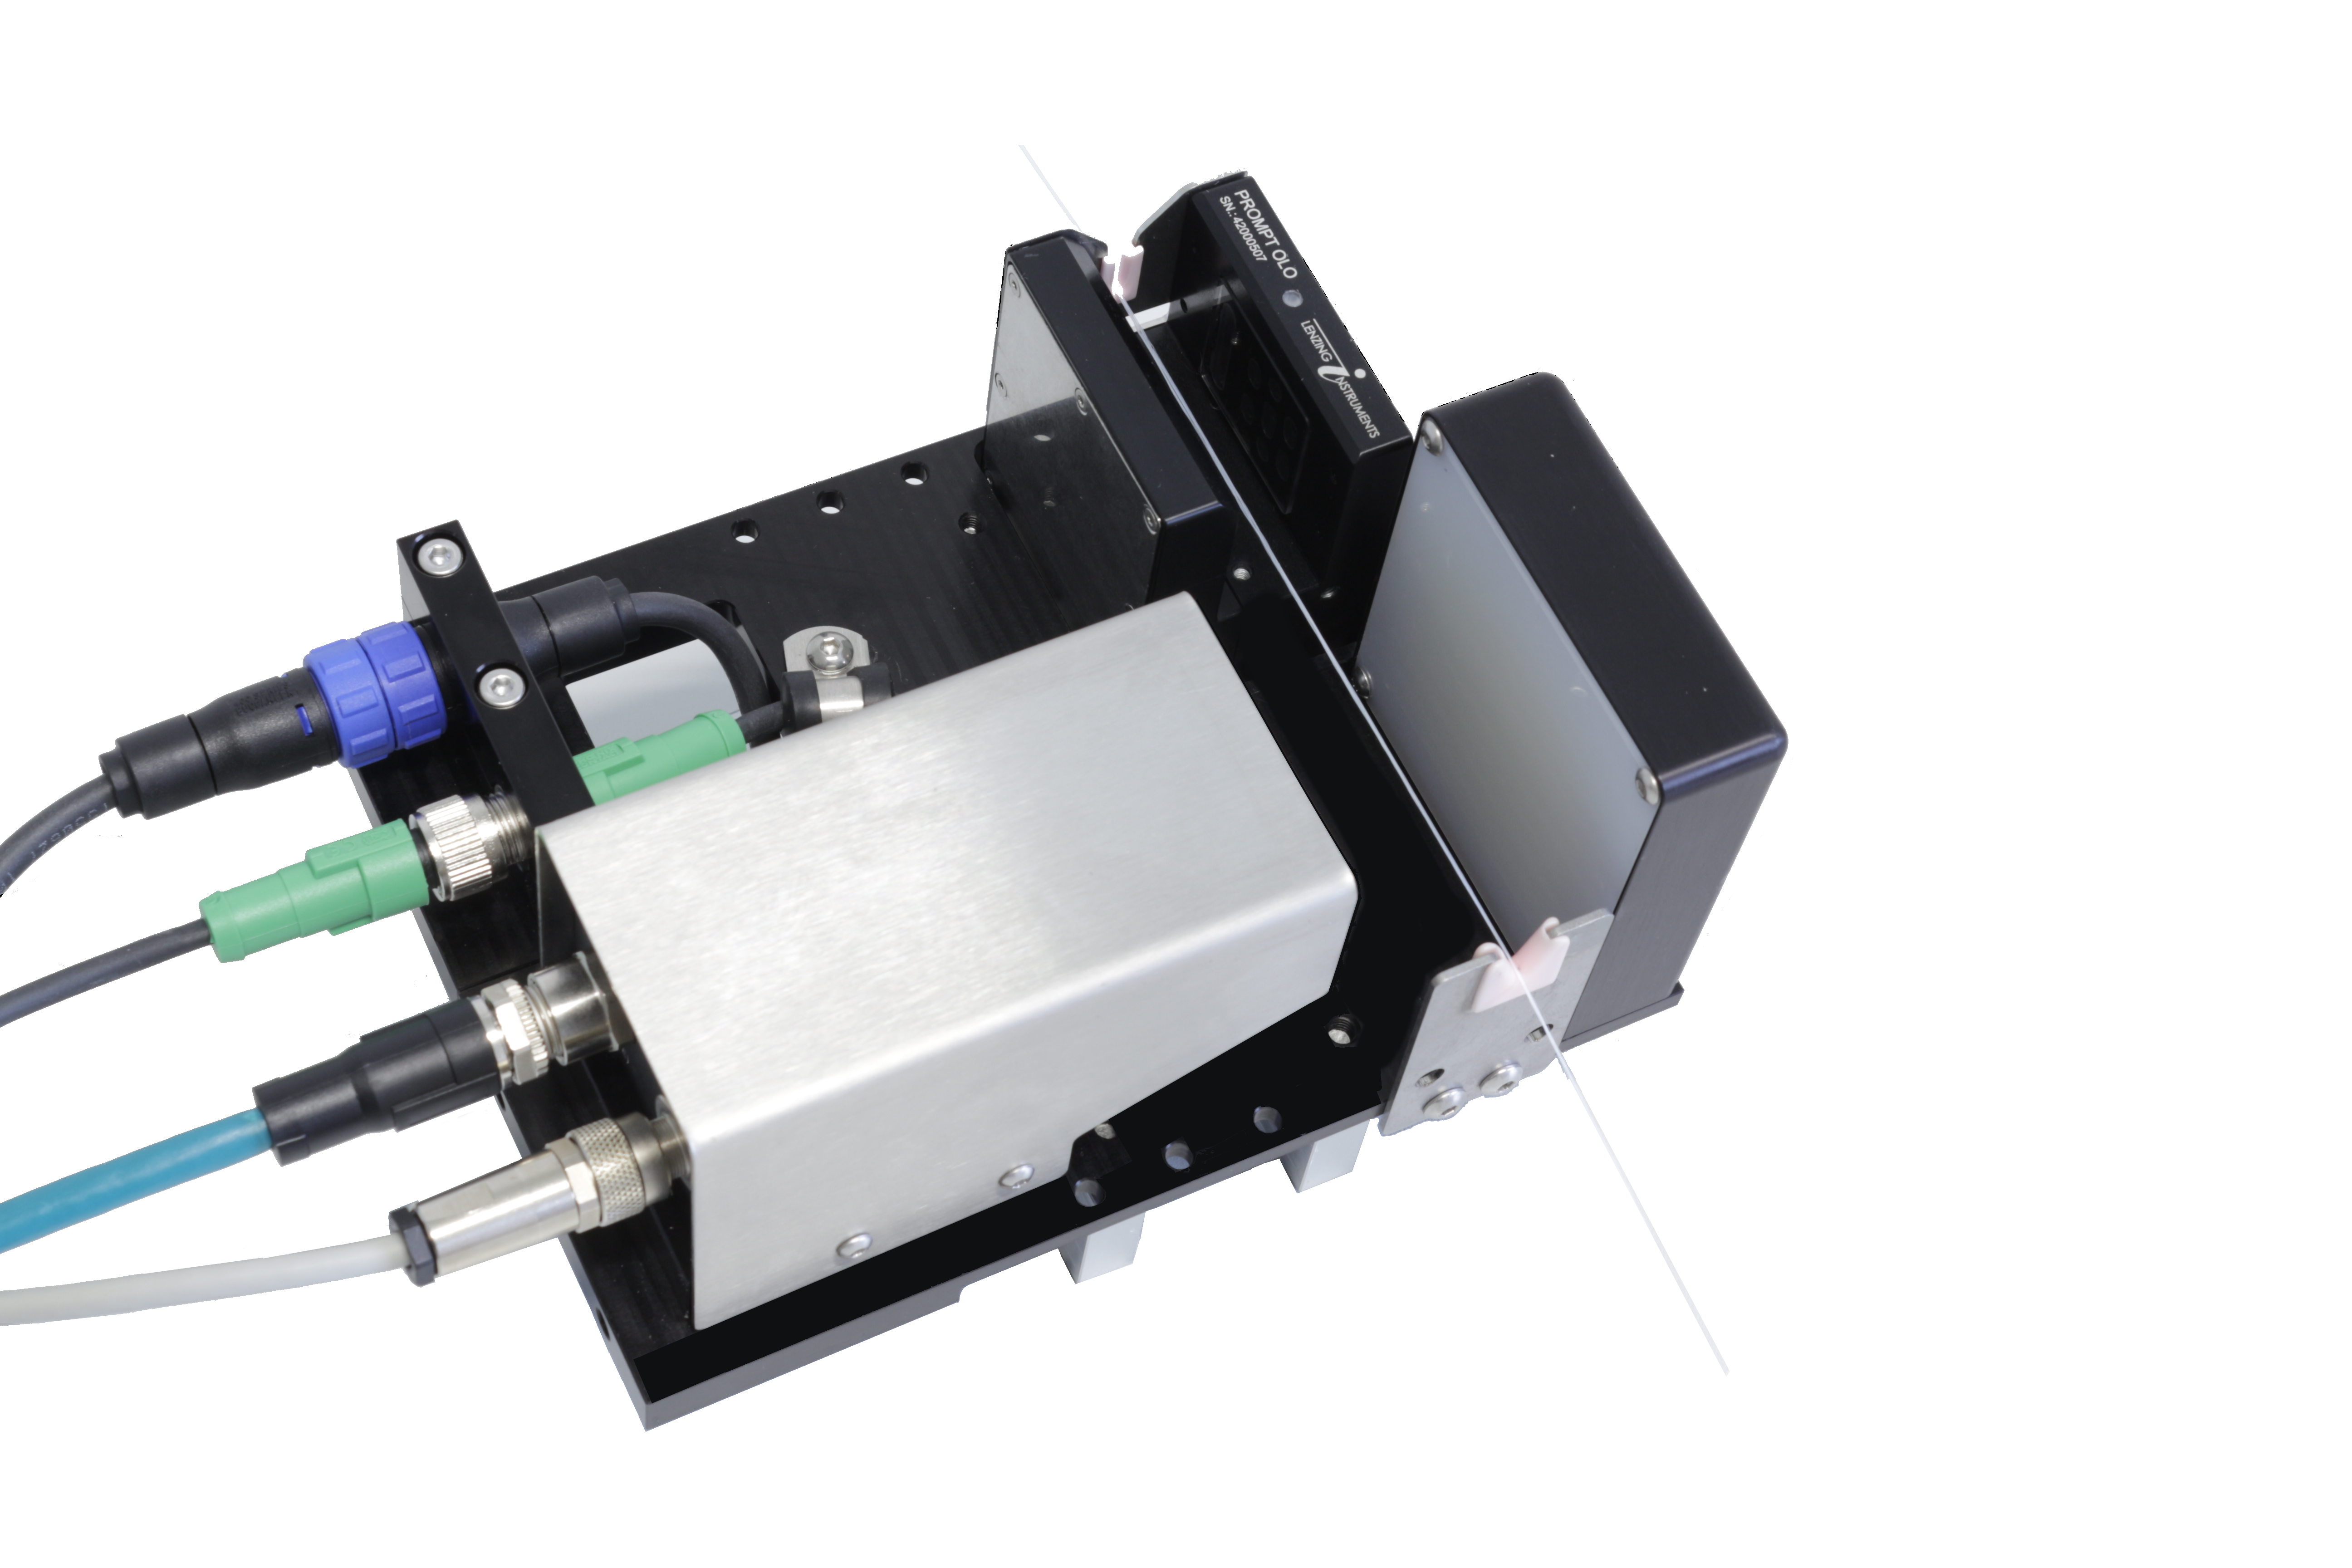
Online quantification, classification, visualisation and localisation of defects: Broken filaments, fluff, thin- and thick places. Feedback about vital yarn characteristics including diameter variations, interlace and twist.
Detailed data analysis
The DEFECT VIEW unit yields real time information about the quantity and type of defect, the localisation thereof as well as possible deviations from set quality levels. This makes Defect View a perfect tool for complete feedback about the yarn quality.
Versatile system
Defect View can be applied for process optimization, research and development as well as for optimization of sensor settings. The portable unit is easily mounted at the yarn position to be monitored.
Fully automatic
After sample positioning, testing takes place automatically without any further interference by the operator. Therewith, efficient and objective testing is achieved with reliable and reproducible test results.
Multi-fiber testing
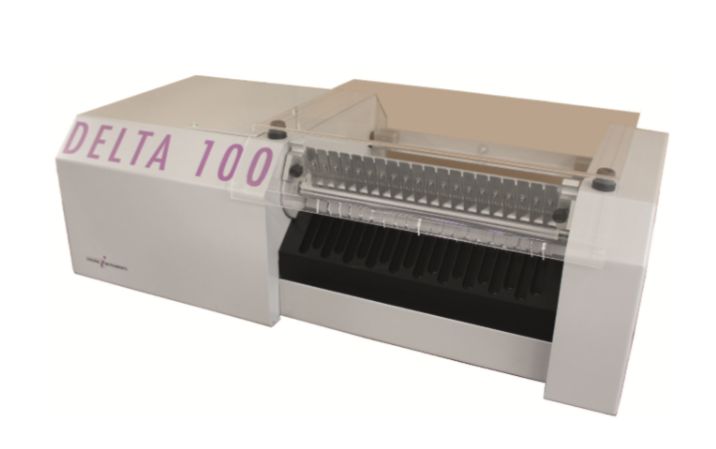
Up to 20 single fibers are tested simultaneously in one test run.
Easy and comfortable sample positioning by means of pretension weights and adjustable scrubbing angle.
Well-proven
DELTA 100 fulfils the requirements of fiber producers for abrasion testing.
Test method:
The single fibers are clamped over a rotating and constantly moistened shaft with a defined angle and a titer-dependent pretension weight. The wet abrasion level is determined by the number of revolutions at which the fiber breaks.
Prediction of yarn processability:
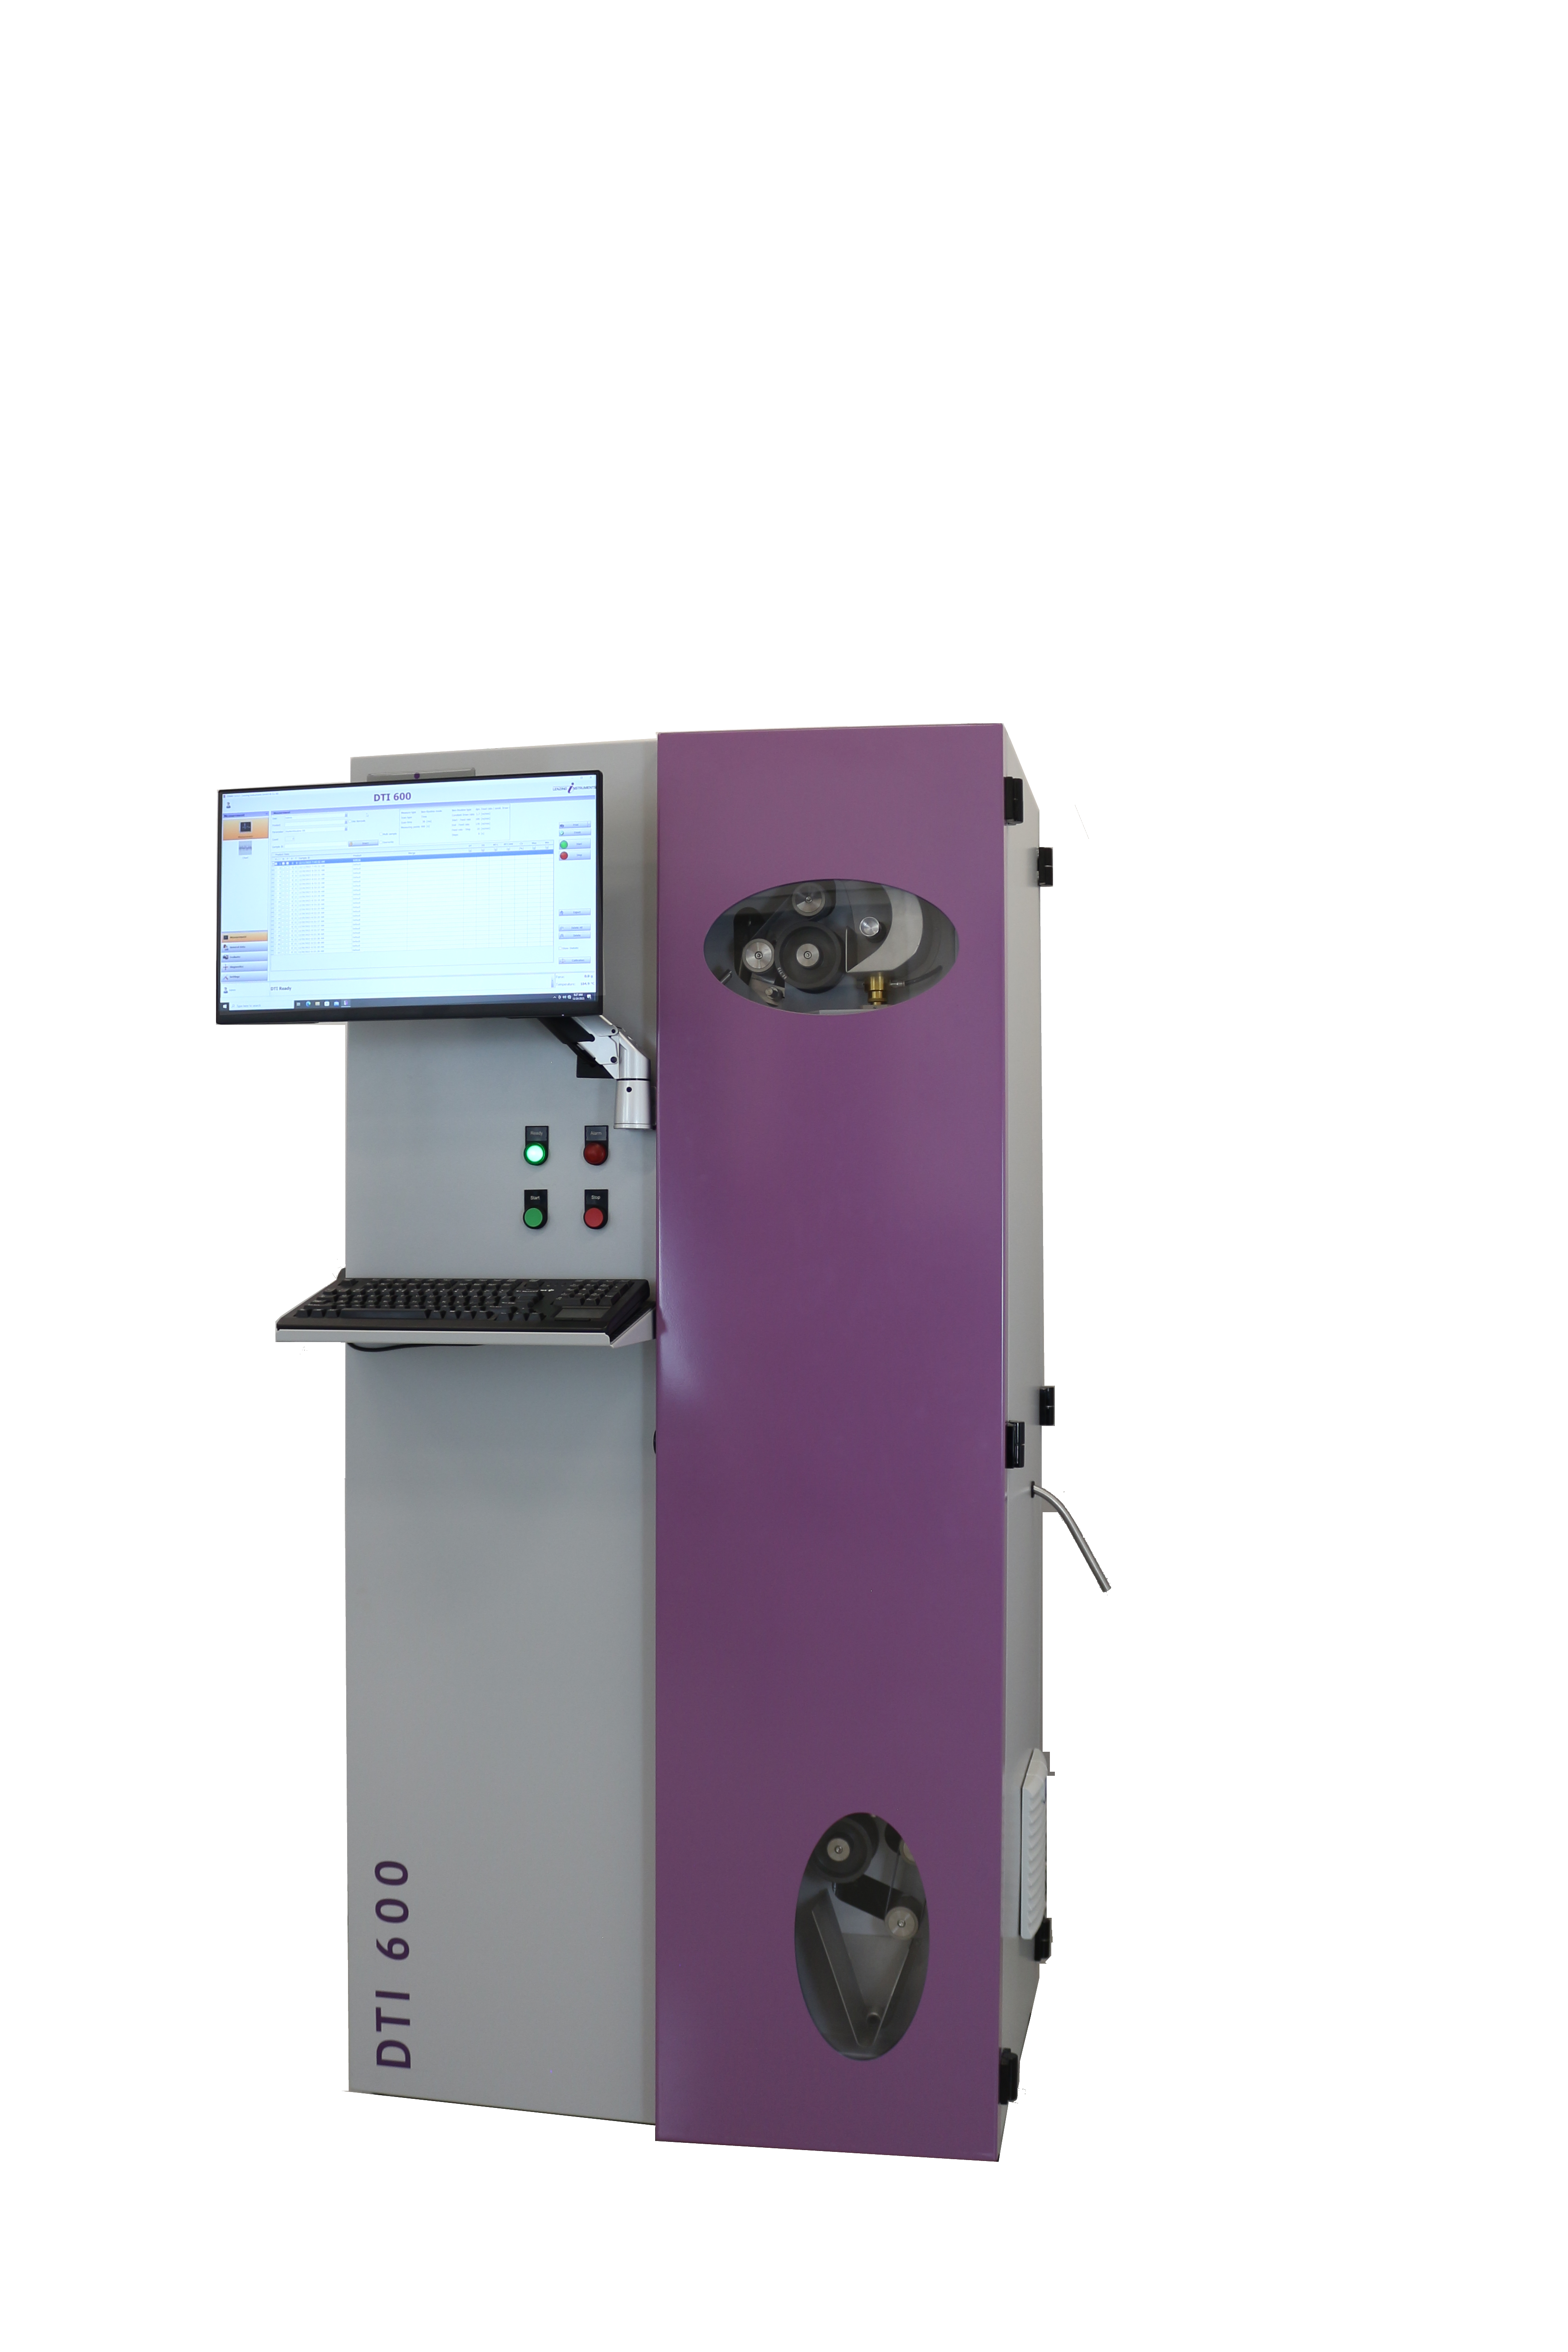
Draw tension reflects the molecular orientation of the yarn. With DTI 600, it is possible to predict the behaviour of POY yarn in texturing, drawing and dyeing processes.
At-line application
DTI 600 is placed directly in the production, close to the spinning position. This together with the high-speed testing Test principle means timely reactions to minor quality, hence less downgraded material with cost savings as a result.
Easy results evaluation
Intuitive and easy analysis of measurement results. Thorough problem analysis with special key figures: No need for expert personnel.
Highly automated handling
DTI 600 features automatic yarn string-up and sample removal. An even higher automatization degree can be achieved if DTI 600 is used together with the optional SESS Sequential End Sampling System: With SESS, up to 24 positions are handled centrally and automatically for efficient sample feeding to DTI 600 or any other of Lenzing Instruments filament testing instruments without any need for operator interference.
Test method:
During the draw tension measurement, the running yarn is drawn to a certain percentage and heated to a specific temperature for determination of the tension developed in the yarn.
Standardized according to ASTM D 5344.

Real time results
Number of detected defects and the respective positions along the yarn are reported in real time by the powerful software PROMPT Visualize.
A special defect assessment mode enables human inspection of generated defects: If activated, the yarn stops automatically as soon as a defect is detected.
Efficient: ELKOMETER 200 monitors up to 8 yarn ends simultaneously for defects. The high-volume testing concept enables timely reactions to minor quality, meaning less customer claims or rejected goods and therewith cost savings.
Inspection method: A powerful yarn take-off unit transports the yarn ends through parallel positioned PROMPT OLO sensors for real time monitoring of defects. Optionally, a camera system can be integrated to the system for in-depth analysis with images of detected defects.
Short duration
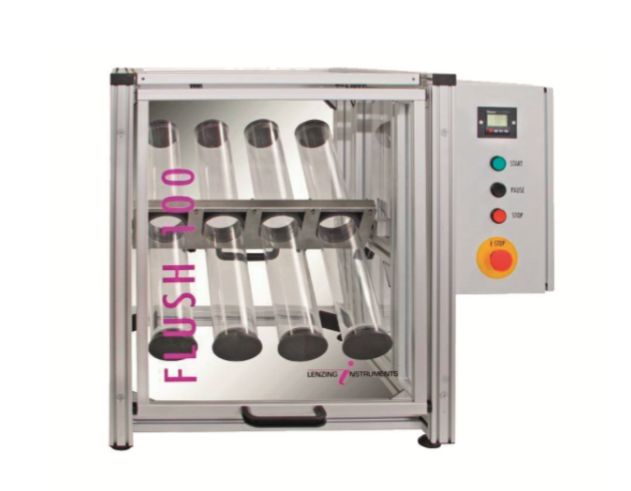
The short test duration makes FLUSH 100 a perfect tool to quickly estimate the flushability of nonwoven materials for process- or product modifications.
Easy to use:
FLUSH 100 features comfortable sample preparation as well as simple handling.
Test method:
The physical break up behaviour of the sample in turbulent water is monitored by exposing it to rotational movements when being placed in a water filled tube. The dispersability characteristics of the material are analysed by means of determining the size of the remaining material.
Complies with recommendation FG 511.2 INDA/EDANA.
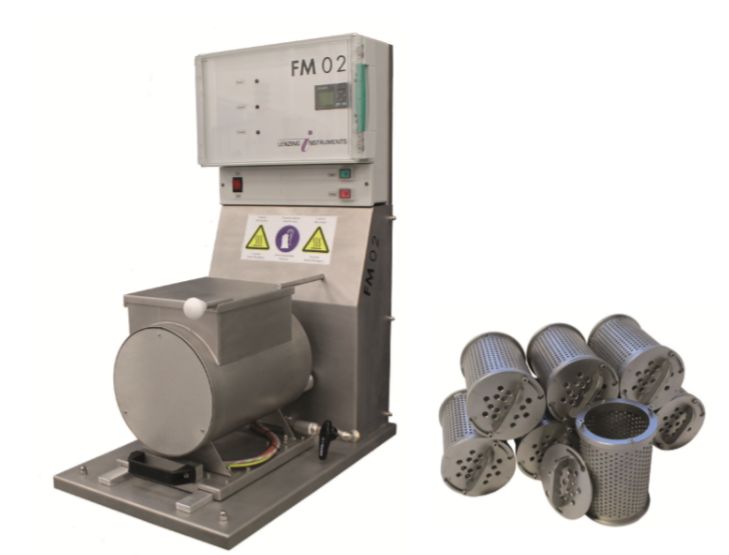
Efficient
FM 02 enables time-saving sample dyeing: Up to 8 fiber samples can be dyed simultaneously.
Flexible:
Flexible handling is given by the possibility of selecting various time- and temperature settings.
Objective
The automated Test principle assures for a reproducible dyeing procedure without any subjective influence of the operator.
Test method: Fiber samples are placed in sample cages, which are continuously perfused with dye colour through the rotating movement of the cylinder, in which the cages are positioned. The dyeing process is both temperature- and time controlled.
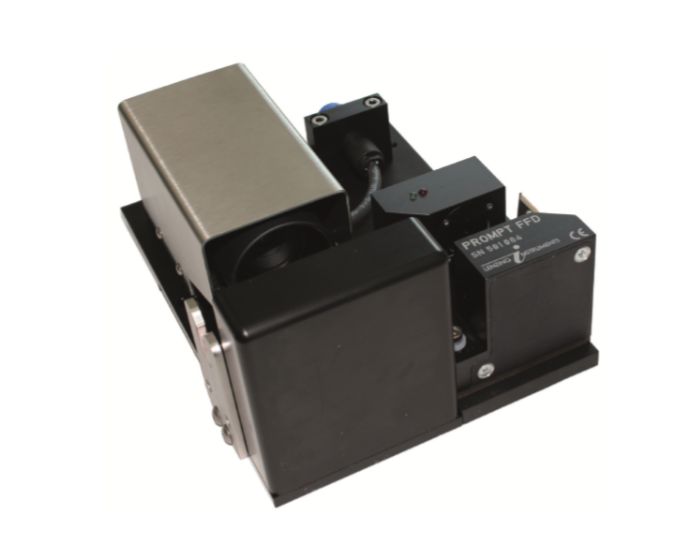
In-depth monitoring
Online quantification, classification, visualisation and localisation of defects:
Broken filaments and fluff.
Detailed data analysis
The FRAY VIEW unit yields real time information about the quantity and type of defect, the localisation thereof as well as possible deviations from set quality levels. This makes FRAY VIEW a perfect tool for complete feedback about the yarn quality.
Versatile system
FRAY VIEW can be applied for process optimization, research and development as well as for optimization of sensor settings. The portable unit is easily mounted at the yarn position to be monitored.
Inspection method
FRAY VIEW combines a PROMPT FFD sensor with a high-resolution camera. The unit enables images of detected broken filaments and fluff to be generated. As soon as the PROMPT FFD sensor detects a yarn defect, the camera system is triggered to capture an image thereof.
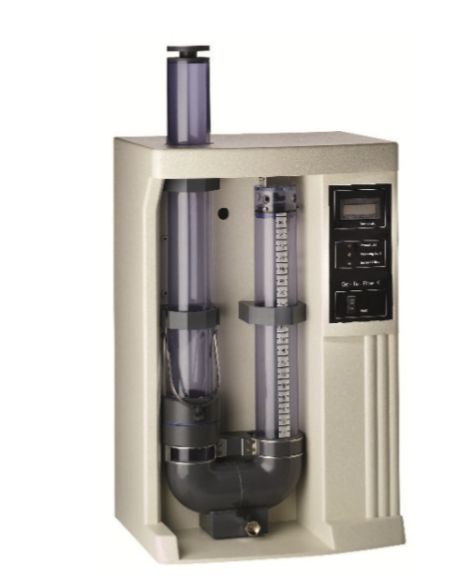
Standardized measurement
In accordance with EN ISO 11058, GE-TE-FLOW measures the VIH50 velocity index of the tested material. The standardized measurement method is approved in industrial and public laboratories.
Optionally, also permittivity values are generated according to ASTM D4491.
Optimized design
GE-TE-FLOW is characterized by compact design and extra low water consumption.
Wide application area
Geotextiles, woven fabrics, fleece, filter materials, sinter plates, perforated sheet metal, porous building materials in plate form and related products.
Test method
The system analyses the rate of water flow through the specimen as a Test principle of the hydraulic head difference in a two-cylinder-system with pressure sensor. The measurement is accomplished normal to the specimen plane and without any load applied. Standardized according to EN ISO 11058 and ASTM D4491.
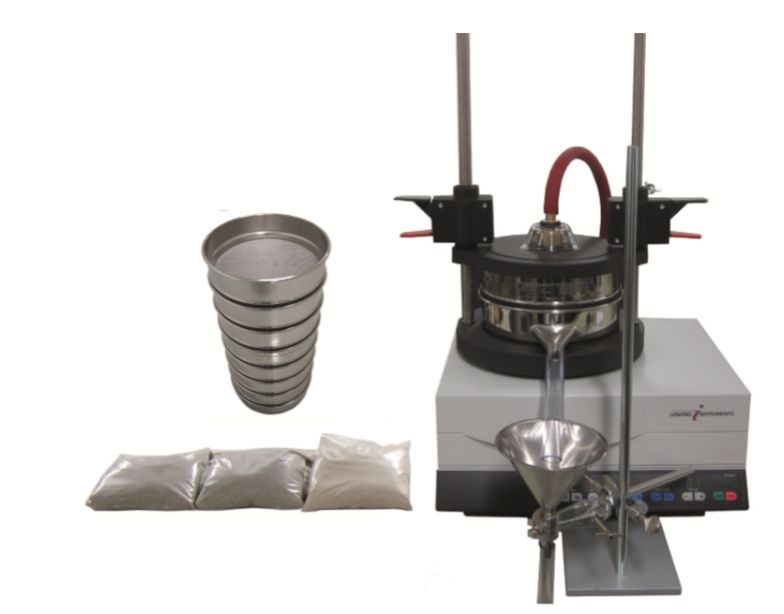
Objective results
Reproducible and objective measurement results are assured for by the automated testing procedure and the standardized handling.
Test method
GT 1200 tests the characteristic opening size of geotextiles by means of a sieving machine, a water flow device and predefined sand. By analysing the size of the sand grains passing through the material, the opening size can be determined. Standardized according to EN ISO 12956, ASTM D4751 and ASTM D6767.
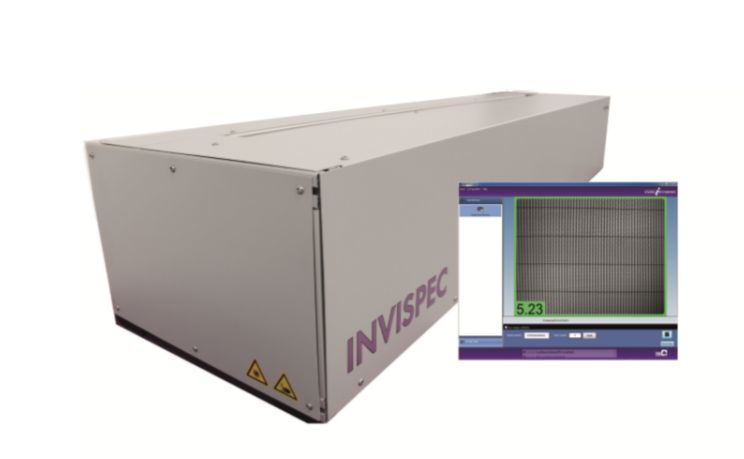
Real time feedback
Integrated directly in the production process, INVISPEC monitors 100 % of any requested material properties for complete process- and product quality control.
Customized
Both camera systems, illumination modules as well as the applied algorithm are adapted to the specific measurement task.
Applied camera systems include line cameras, area cameras, 3D systems, prism cameras etc.
Applied illumination units include incident light, transmitted light, cathedral light, light tunnel etc.
Applied algorithms include state of the art visual inspection technology such as machine learning, deep learning etc.
Examples of use
Nonwovens: Dirt detection, surface defects, fiber orientation, structure analysis.
Staple fiber: Dirt detection, surface defects, crimp count.
Fabric: Weaving defects, material defects, surface defects, pattern defects.
Inspection method
Depending on the measurement task, a customised system is set up of camera units, illumination modules and the corresponding software program to meet your needs.
Simple handling
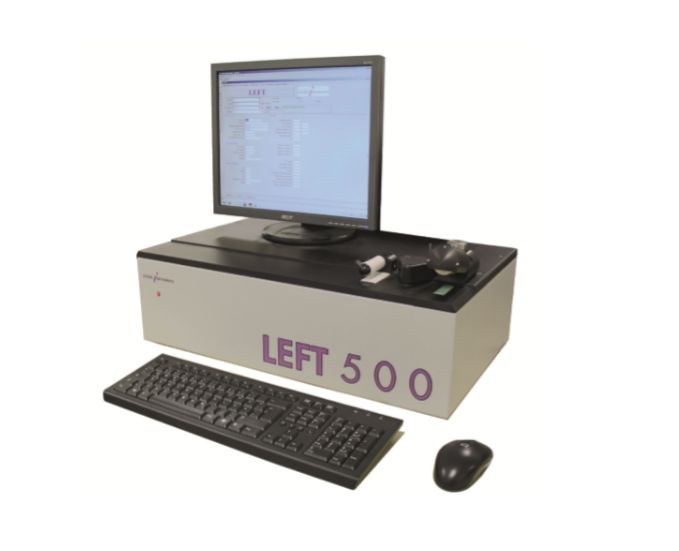
After presenting the film sample to LEFT 500, the monitoring of the thickness is accomplished fully automatically. No expert personnel is needed.
Industry conform
The Test principle of LEFT 500 was developed in cooperation with synthetic film producers.
Application areas
Synthetic film, metal foil, paper etc.
Test method
An inductive sensor scans the film and thickness variations are registered in the LEFT 500 software program. During sample feeding, specially coated low friction antistatic surfaces with bilateral dust remover are applied. This allows for smooth measurement of statically charged and conductive films.
Standardized according to DIN 53370 and DIN 55543.
Objective results
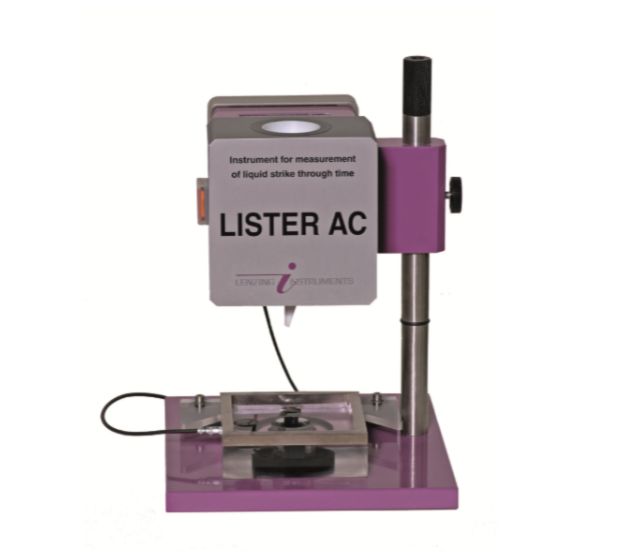
After sample preparation, the operator only needs to press one button. This ensures for objective, accurate and reproducible results without any human impact.
Standard setting
Lenzing Instruments is official partner of EDANA for the liquid strike-through measurement.
Internationally acknowledged
LISTER AC is standard setting when it comes to determination of the liquid strike-through properties of nonwovens. More than 800 instruments are in use all over the world.
Supplier of filter paper
The needed standardized filter (blotter) paper can be acquired from Lenzing Instruments
Test method
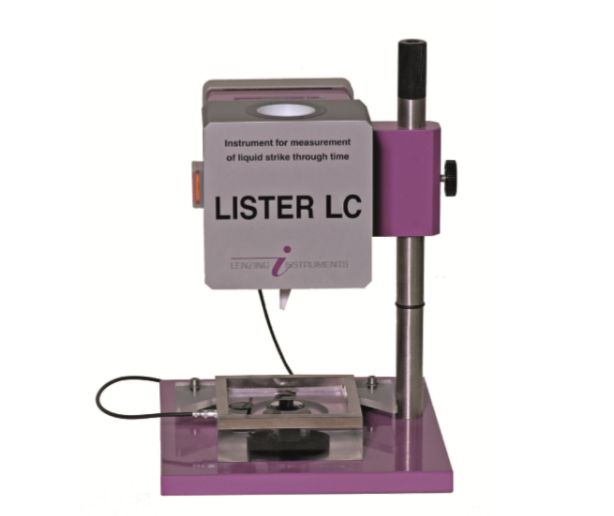
A known volume of liquid (e.g. synthetic urine) is automatically and at constant rate discharged through the centre hole of the LISTER electrode plate onto the sample of nonwoven coverstock. A timer is activated as soon as the electrically conductive liquid passes the electrodes. The nonwoven sample is placed onto a set of filter papers, which serves as the absorbent core. After the liquid has penetrated into the absorbent pad, the electrical circuit is interrupted, the timer is stopped and the liquid strike-through time is displayed.
Standardized according to INDA/EDANA WSP 70.3 and WSP 70.7.
Multi-sample
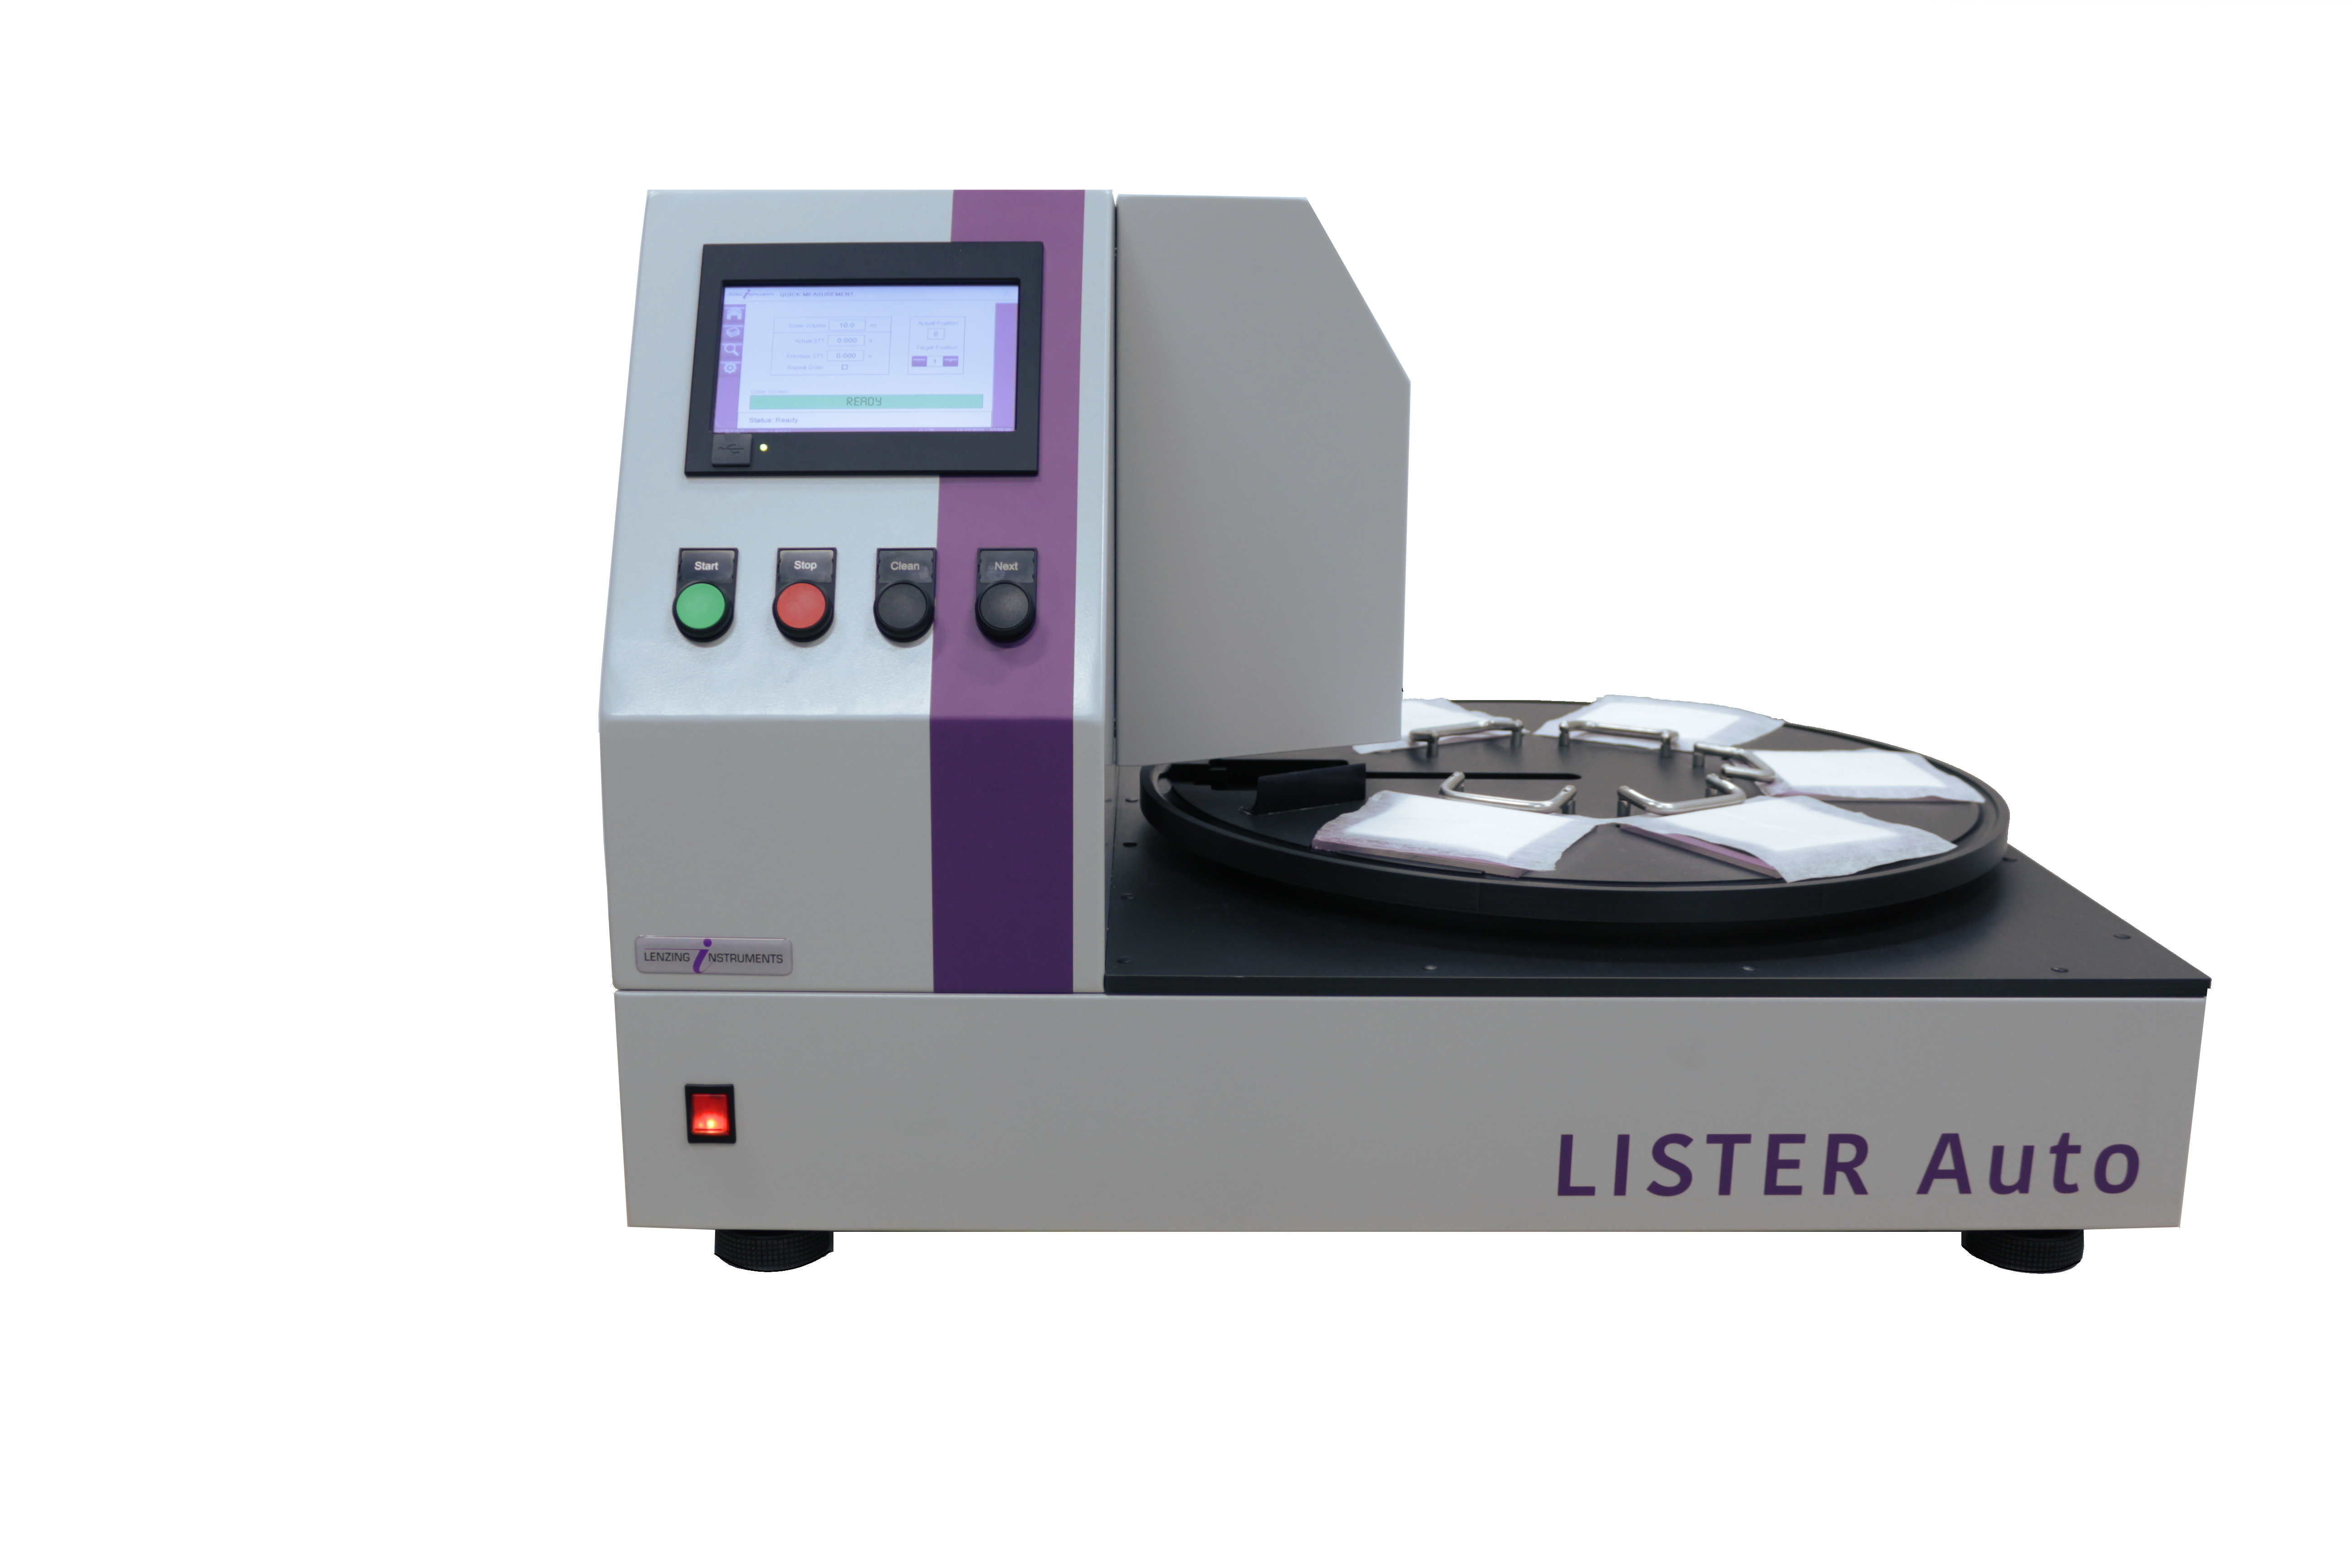
High-volume testing is made easy by means of a rotating plate, which presents up to five single samples successively to the integrated LISTER unit.
Fully automatic
Once the samples are positioned, LISTER AUTO conducts the liquid strike-through measurement entirely automatically.
No manual test liquid handling
For each single test, the needed amount of test liquid is discharged automatically. This ensures controlled liquid feed with reduced operator influence.
Repeated test made easy
In cases where the repeated liquid strike-through test is part of the routine, LISTER AUTO ensures a consistent and reliable measurement process while also saving time: The integrated timer regulates the interval between specified single measurements and eliminates any variability caused by manual timekeeping. Additionally, the fully automatic procedure frees up time for other tasks.
Efficient and cost-saving
The fully automatic liquid dosing- and measurement procedure means that less time is spent for the liquid strike-through measurement, the need for personnel resources is reduced and cost savings can be achieved.
Objective results
The high degree of automation ensures objective, accurate and reproducible results without any human impact on the test outcomes.
Standard setting
For more than 40 years, Lenzing Instruments has set the standards when it comes to determination of liquid strike-through properties of nonwovens.
Lenzing Instruments is a partner of EDANA for the liquid strike-through measurement.
Supplier of filter paper
The needed standardized filter (blotter) paper can be acquired from Lenzing Instruments
Test method
A known volume of liquid (e.g. synthetic urine) is automatically and at constant rate discharged through the centre hole of the LISTER electrode plate onto the sample of nonwoven coverstock. A timer is activated as soon as the electrically conductive liquid passes the electrodes. The nonwoven sample is placed onto a set of standardized filter papers, which serves as the absorbent core. After the liquid has penetrated into the absorbent pad, the electrical circuit is interrupted, the timer is stopped and the liquid strike-through time is displayed. The turntable moves to present the next nonwoven sample to the LISTER measurement unit.
Standardized according to INDA/EDANA WSP 70.3 and WSP 70.7.
Objective results
After sample preparation, the operator only needs to press one button. This ensures for objective, accurate and reproducible results without any human impact.
Standard setting
Lenzing Instruments is official partner of EDANA for the liquid strike-through measurement.
Supplier of filter paper
The needed standardized filter (blotter) paper can be acquired from Lenzing Instruments
Test method
A known volume of liquid (e.g. synthetic urine) is automatically and at constant rate discharged through the centre hole of the LISTER electrode plate onto the sample of nonwoven coverstock. A timer is activated as soon as the electrically conductive liquid passes the electrodes. The nonwoven sample is placed onto a set of filter papers, which serves as the absorbent core. After the liquid has penetrated into the absorbent pad, the electrical circuit is interrupted, the timer is stopped and the liquid strike-through time is displayed.
Thorough material analysis
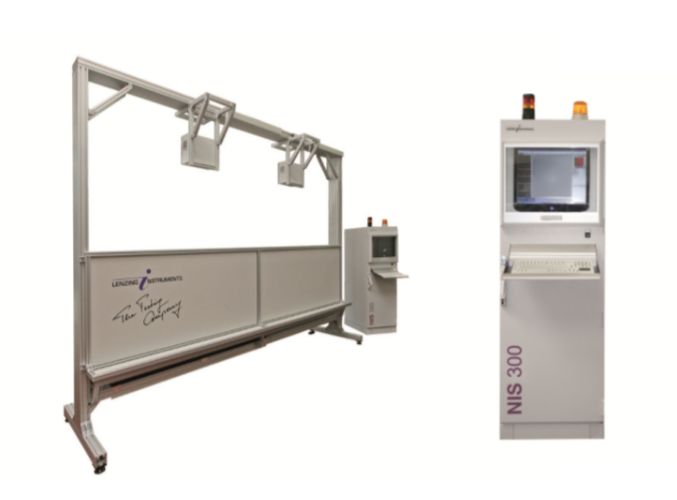
NIS 300 enables 100% inspection of defects and vital material properties. Examples of monitored defects: Spills, streaks, wrinkles, holes, folds, contamination, colour spots, colour shades, printing defects etc. Further inspected web properties include optical density, homogeneity and uniformity of embossing.
Modular system
The modular system with a variety of illumination units, camera systems and software modules guarantee for highest adaptability to the vast variety of nonwoven products. Optimum optical configuration means accurate defect detection also of low contrast defects.
Wide application area
NIS 300 is applicable for technical, textile and automotive fabrics as well as for glass fabrics and composite fabrics.
Inspection method
Depending on the measurement task, a customised system is set up of camera units, illumination modules and the corresponding software program to meet your needs. The nonwoven web is continuously monitored for feedback on defects and misprints. Defects are graded into defect classes. Detected defects are displayed as real time images of the defects and in a quality matrix.
Tensile properties non-destructive
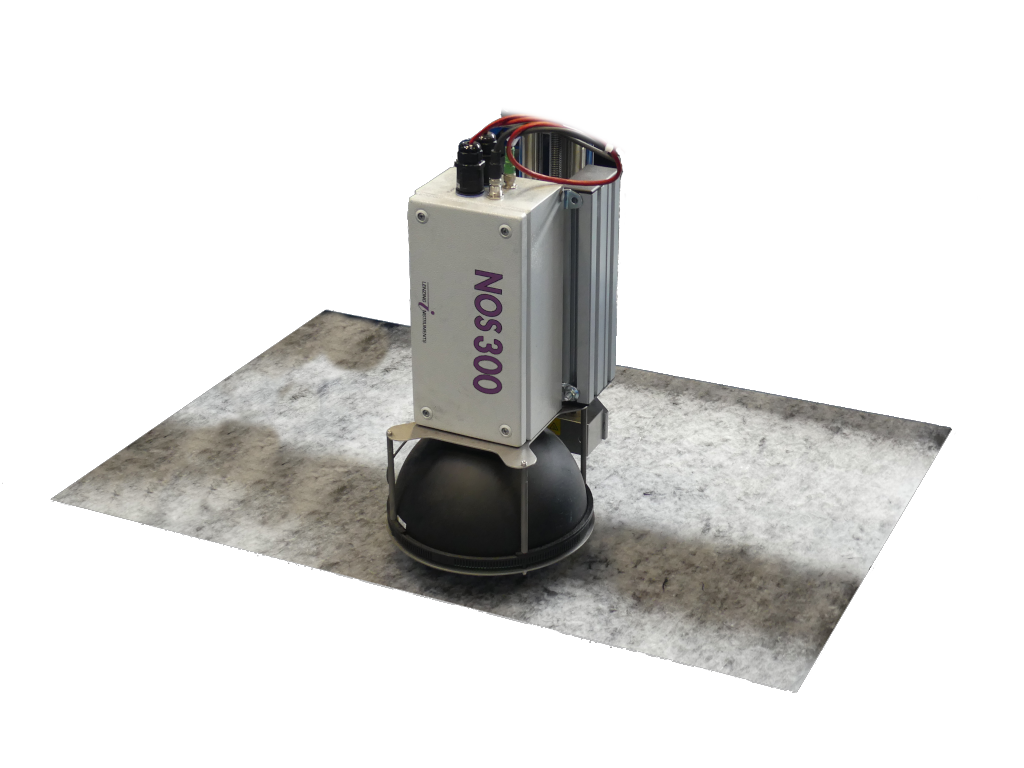
The ratio of fibres in machine direction vs. cross direction, MD:CD, of the web gives indirect information about the tensile strength of the nonwoven material. Hence the traditional tensile test in the laboratory can be replaced by the non-destructive, objective and continuous measurement Test principle of NOS 300. The fiber orientation analysis with NOS 300 shows high correlation to tensile tests performed in the laboratory.
Homogeneity information
By monitoring the ratio of fibers in machine versus cross direction with NOS 300, producers also get an indication of the homogeneity of the nonwoven web.
Immediate feedback
Applied online, NOS 300 generates immediate feedback about any changes in the fiber orientation of the web. This enables quick reactions to process deviations and therewith cost savings in terms of reduced waste and/or down-graded fibers.
Inspection method
NOS 300 gathers information about the frequency of the fiber position angle in relation to the machine- and cross directions. The image processing system consists of incident LED illumination and a high-resolution camera unit. Images are continuously grabbed and the fiber orientation is determined by means of a special algorithm.
Quick feedback
With OPUMETER, deviations from the ideal spin finish content are detected within seconds.
This enables timely reactions to issues such as air bubbles, faulty pumps or applicators.
Real time results display
During monitoring, the measured % OPU / % FOY is displayed graphically for real time feedback about the spin finish status. In the OPUMETER software, quality limits can be set for easy reaction to possible issues with the spin finish application.
Low cost
OPU/FOY testing in the laboratory requires sample preparation and additional accessories such as solvents. With OPUMETER, cost savings are achieved since the spin finish value is monitored directly in the production, on the running yarn, without the need for any consumables.
Inspection method
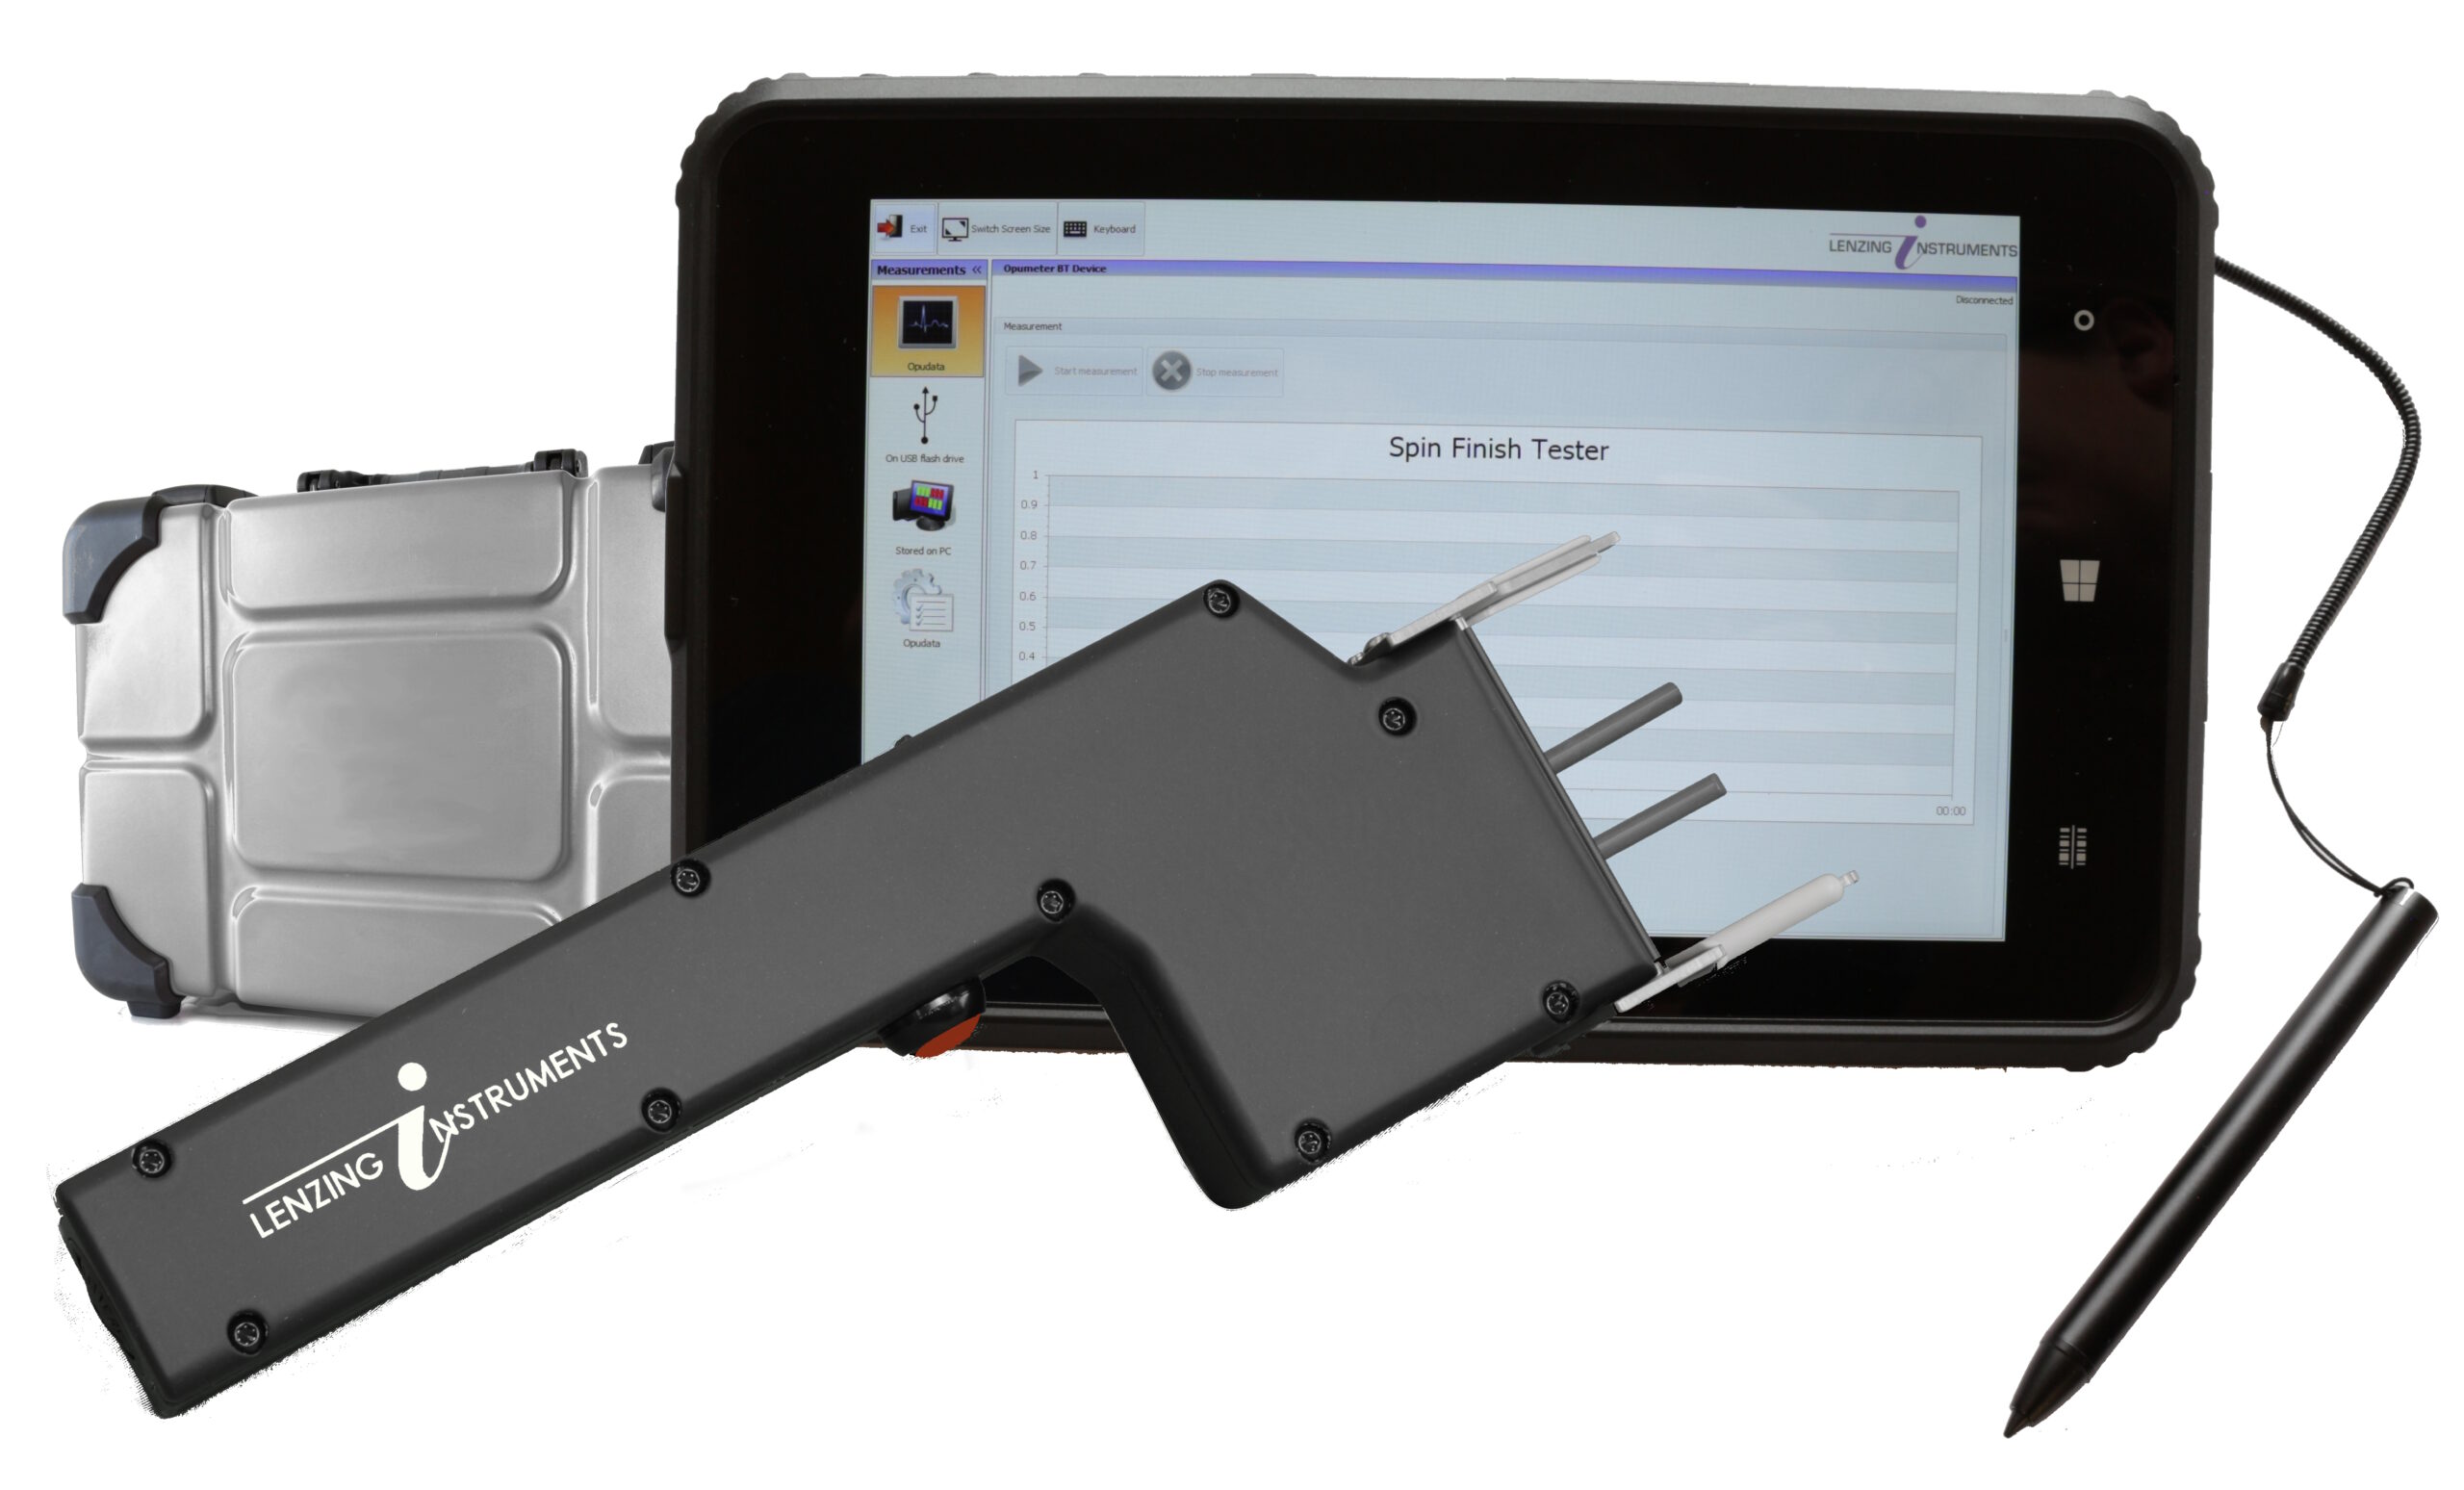
The yarn is guided through the portable OPUMETER handle which incorporates a spin finish sensor based on conductivity technology. The measurement is performed directly at the spinning position and is completed within a few seconds. Measurement results and statistics are displayed via Bluetooth in the OPUMETER software program on a portable evaluation unit.
Easy analysis
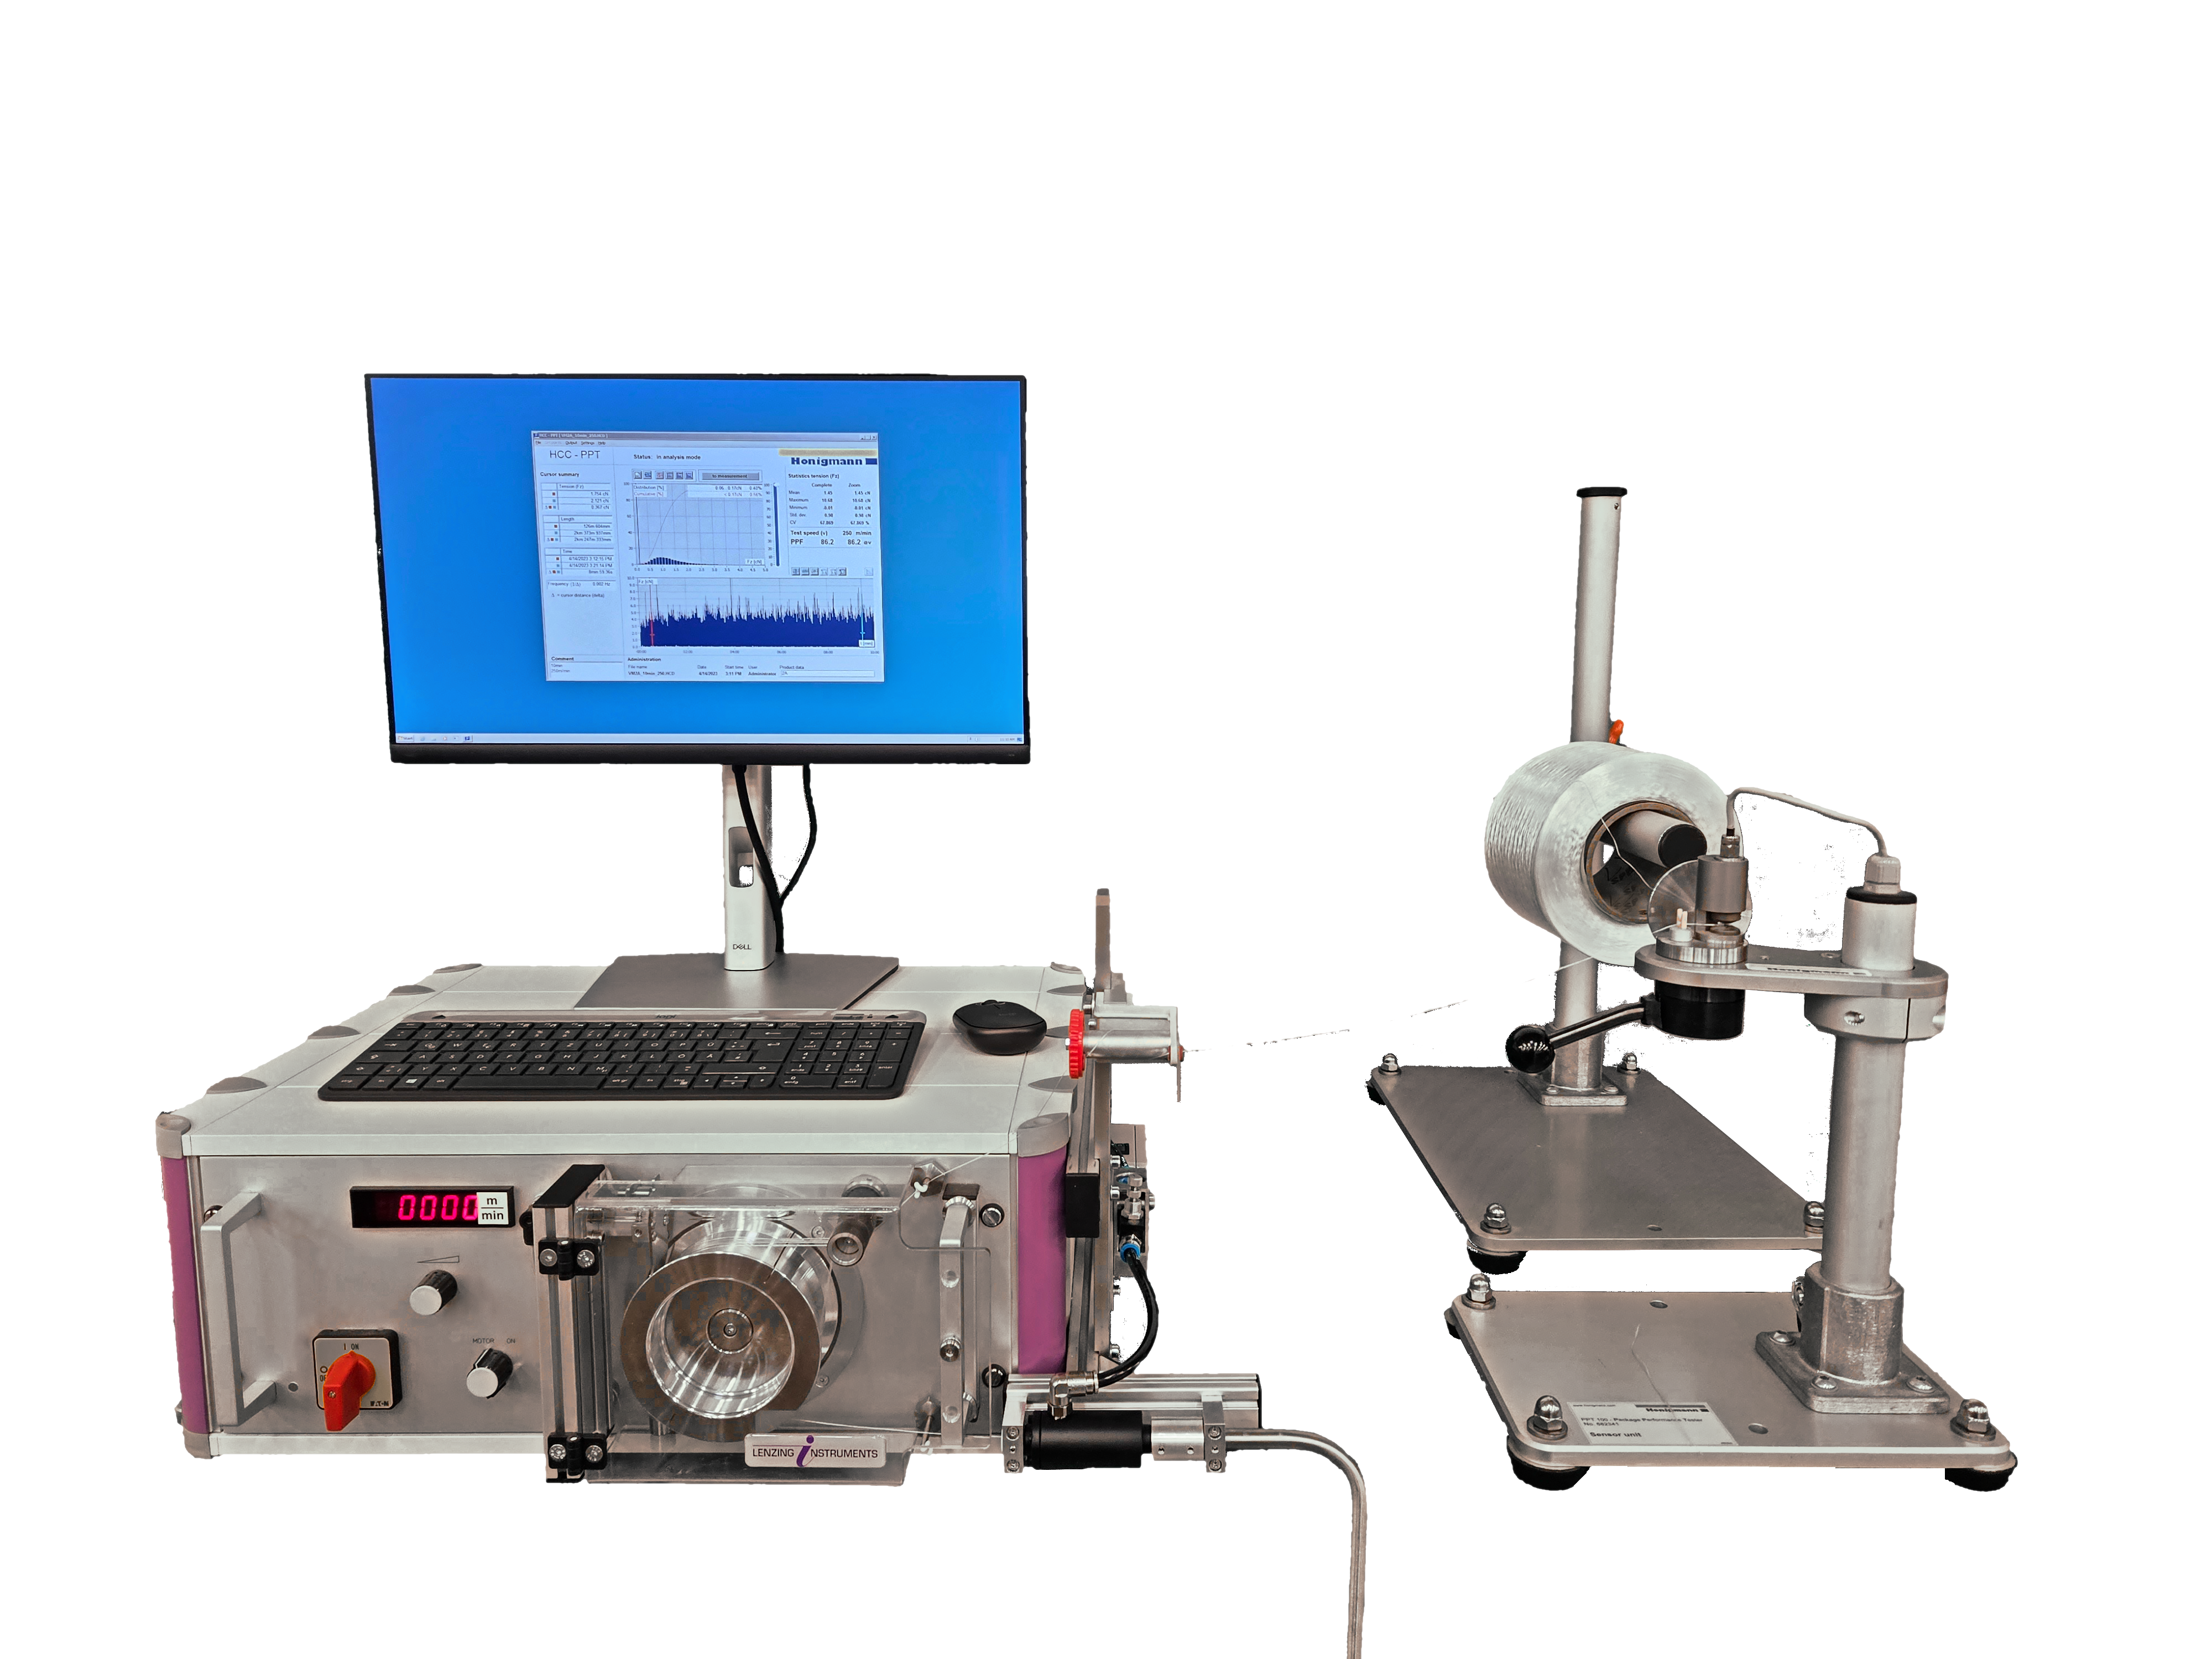
The unwinding performance of the bobbin/package in further processes is easily predicted by means of the Package Performance Factor, PPF: The PPF gives feedback on the average unwinding tension and its standard variation as well as on the absolute values of tension peaks and the tension amplitude. The lower the PPF, the better a bobbin will perform in the next process step.
Sophisticated technology
PPT 100 is of robust design and guarantees for excellent accuracy, perfect repeatability. It also features high zero stability and resolution.
High-speed testing
Yarn take-off speeds are selectable between 0 to 1200 m/min.
Inspection method
The POY yarn is unwinded from the bobbin at defined and constant speed and guided to a tension sensor. The variations in tension are displayed in real time and stored in the PPT software. The unwinding quality of a bobbin depends on the mean, maximum and minimum value of the measured tension.
PPT 100 is offered in cooperation with Honigmann GmbH, Germany.
Precise classification
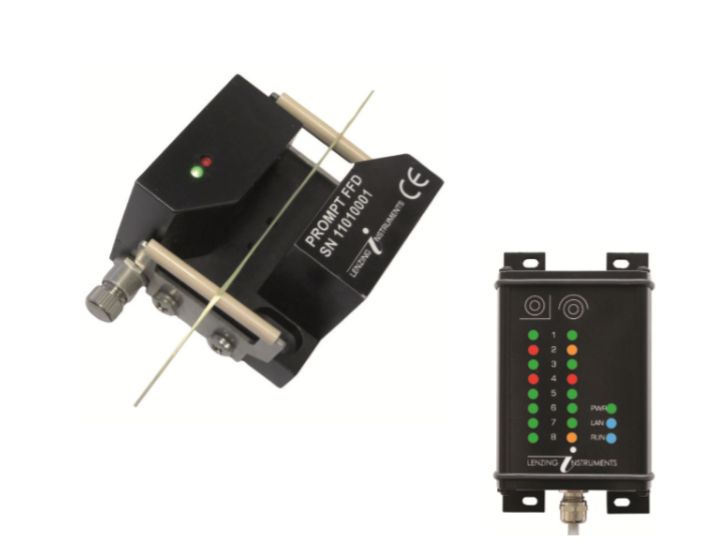
Defects are precisely classified according to the type of detected defect: The applied sensor technology enables a clear classification between broken filaments and fluff. Moreover, the detected broken filaments are grouped according to the length of the broken filaments.
Quality status at a glance
PROMPT FFD features a bi-coloured LED display which indicates the sensor status.
Additionally, a quality indicator can be combined with the mounted sensors for indication of the quality status of the winders.
Flexible data management
Data communication is accomplished either via PC or via a PLC.
Comprehensive data evaluation
Customized settings for data evaluation are made easy in the PROMPT Visualize software.
Inspection method
By means of light barrier technology, the intelligent sensor PROMPT FFD registers broken filaments or fluff directly on the running yarn in the production. Depending on the position of the blocked light barrier, information is yielded about the length of the detected broken filament. A central light barrier monitors the yarn for fluff. Typically applied for technical, industrial and BCF yarn.
Wide application area
PROMPT OLO monitors multifilament yarn for broken filaments, fluff, titer (dtex, den), interlace and twist. Monofilament yarn is monitored for thin and thick places as well as for diameter variations.
Thanks to the high detection sensitivity, PROMPT OLO even enables monitoring of very small defects and variations.
In-depth analysis
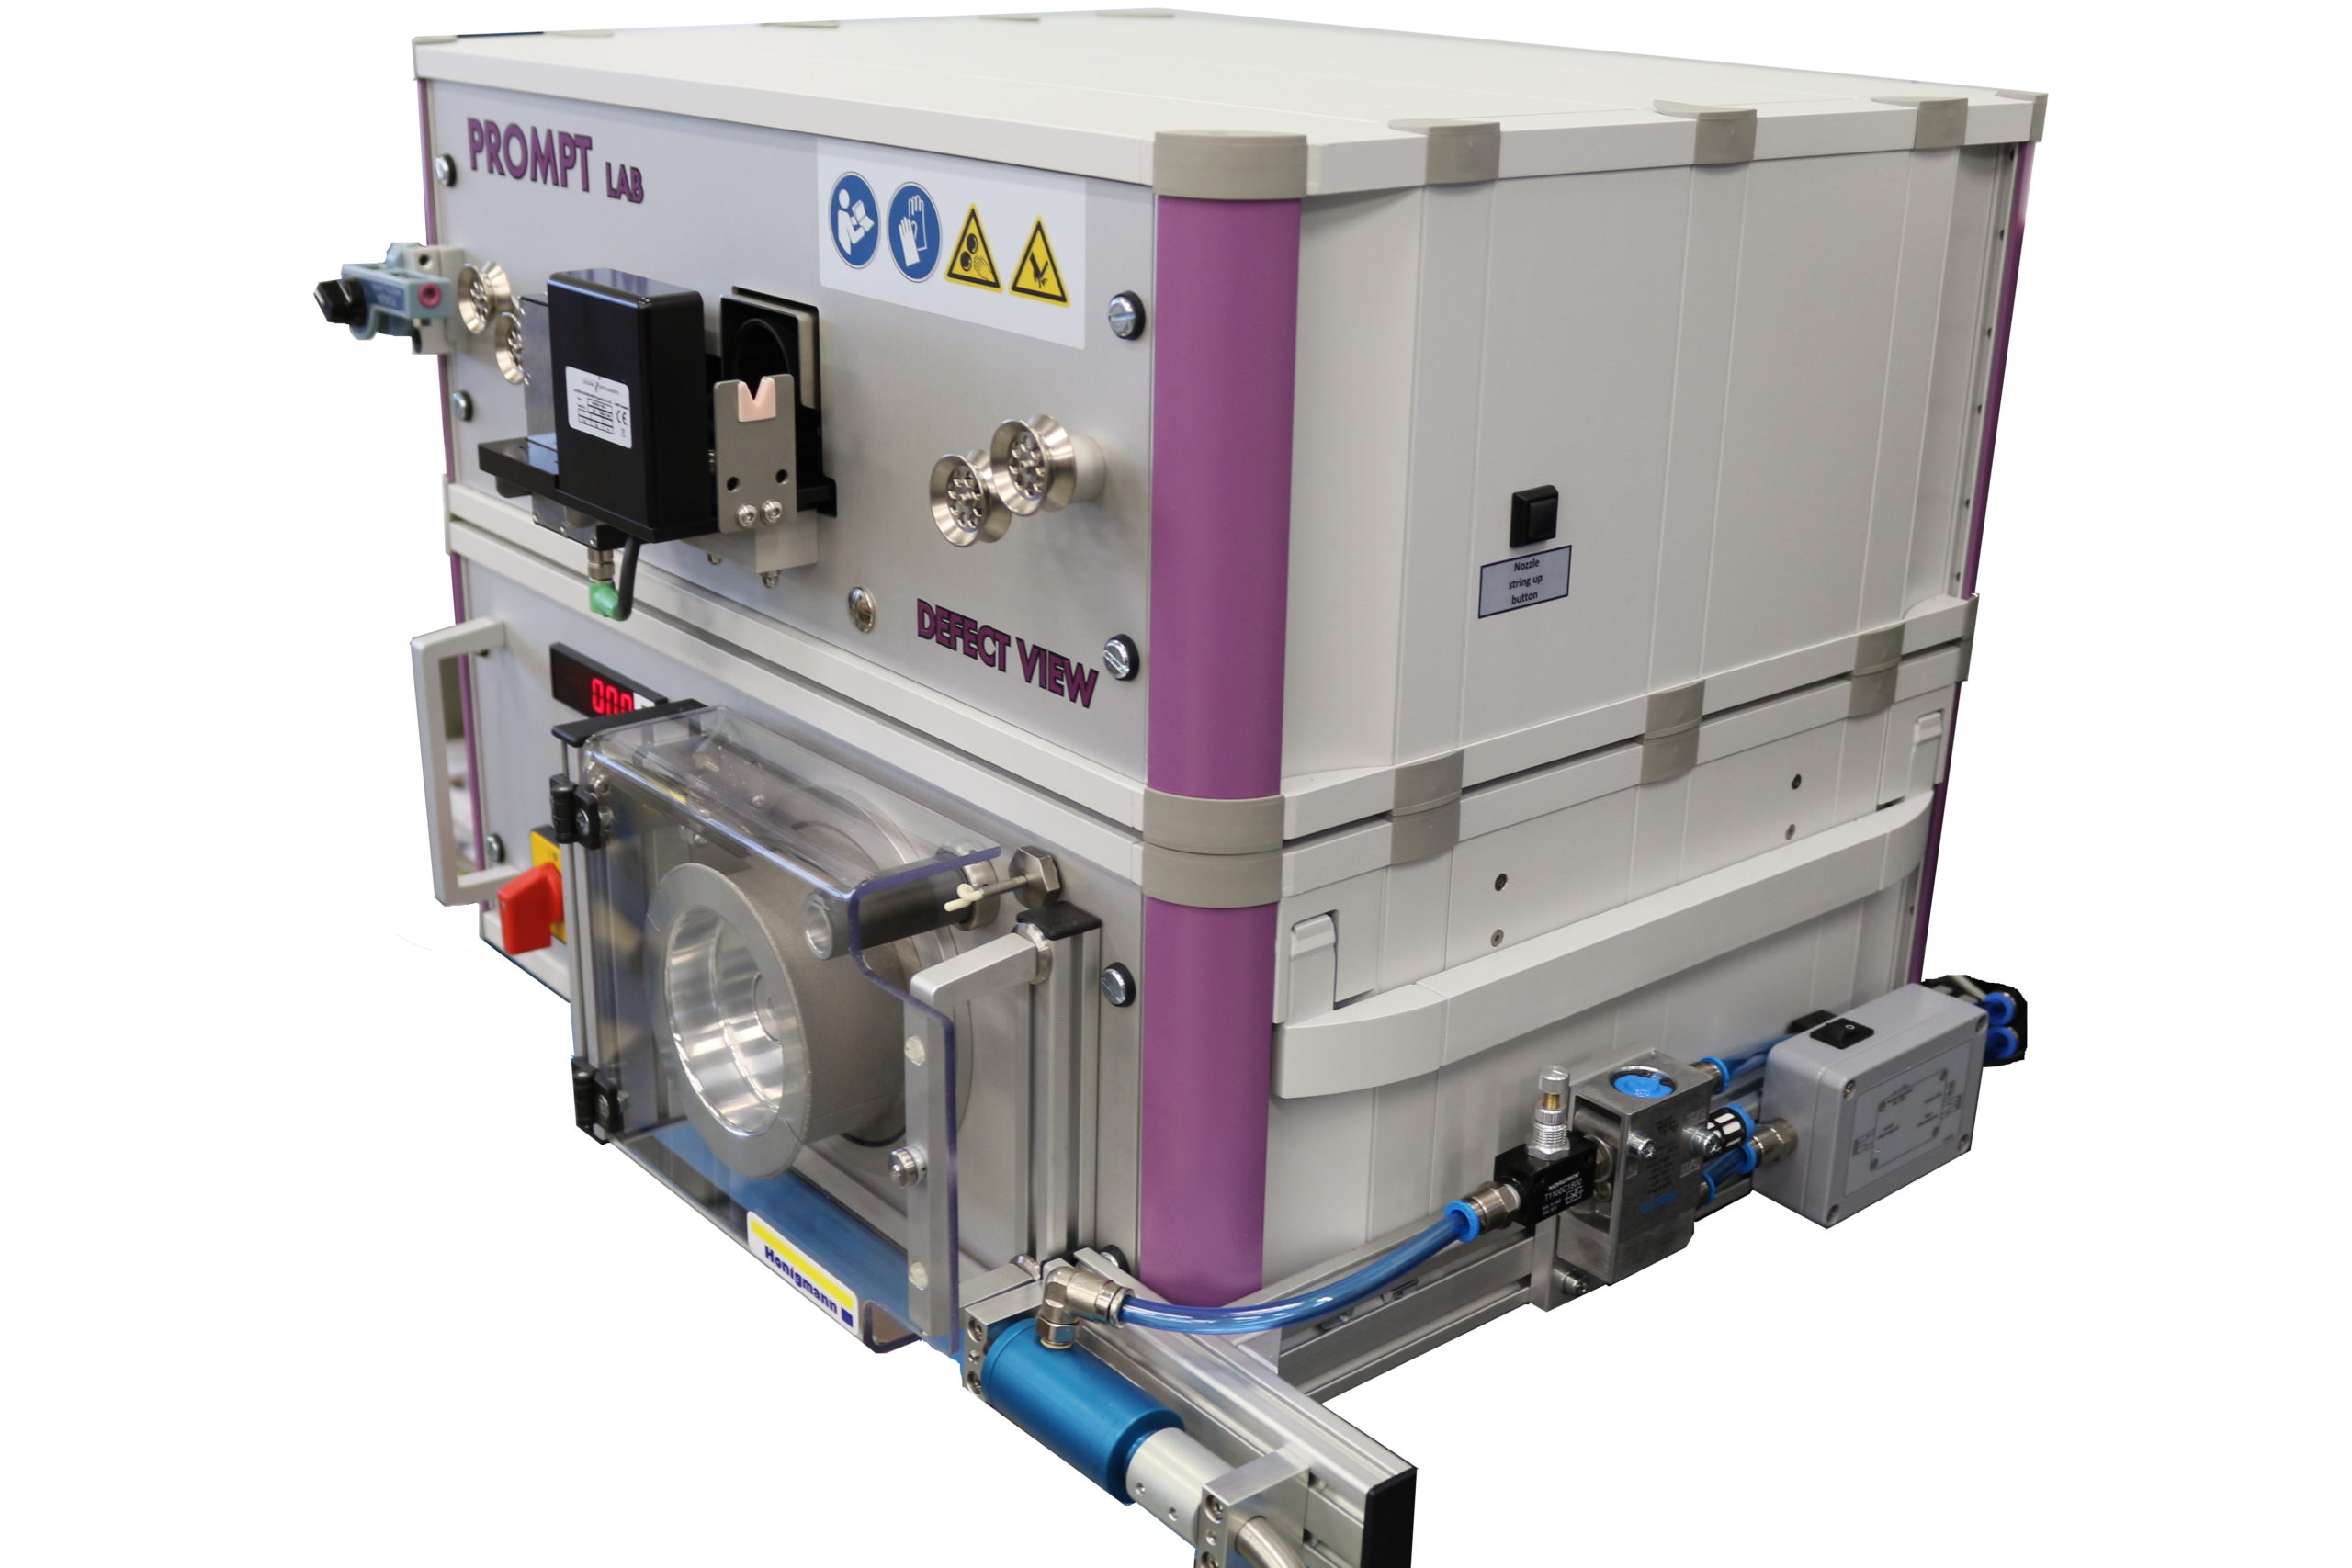
PROMPT LAB enables precise and thorough offline analysis of yarn defects or varying yarn characteristics due to process irregularities. The filament yarn is monitored for defects such as broken filaments and fluff or thin- and thick places. Additionally, information is given about diameter variations of monofilament yarn as well as of interlace, twist and titer (dtex/den) variations of multifilament yarn. Each time a defect is detected by the sensor, a signal triggers the camera to generate an image. The generated images of the defects together with event statistics and information about the defect’s position along the yarn allow for detailed analysis of the yarn properties.
Test method
PROMPT LAB combines a powerful and high-speed yarn take-off unit for yarn transport with Lenzing Instruments sensor technology and a camera unit. The combination enables thorough off-line analysis and visualisation of defects and varying yarn properties directly on the running yarn. PROMPT LAB is available as FRAYVIEW LAB with PROMPT FFD, DEFECT VIEW LAB with PROMPT OLO and YIS 200 LAB with YIS 200.
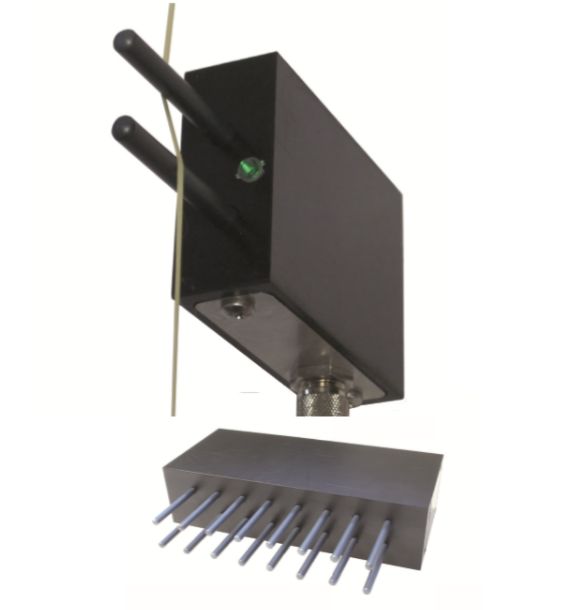
Ideal housing design
PROMPT OLF features compact and robust modular design. It’s ability to withstand rough production environments has been proven in numerous industrial installations.
Easy handling
The design of the PROMPT OLF sensors ensures for easy exchange or replacement of single sensors. Sensors can be exchanged without any interference with the production process or other sensors.
Complete feedback
Real time at a glance monitoring and historical data analysis of spin finish values with the PROMPT visualization software.
Inspection method
PROMPT OLF is integrated in the production process and is based on conductivity technology.
The sensor is installed as a or as a single-end sensor or as multi-end package. Typically applied for POY, FDY, TY, IY.
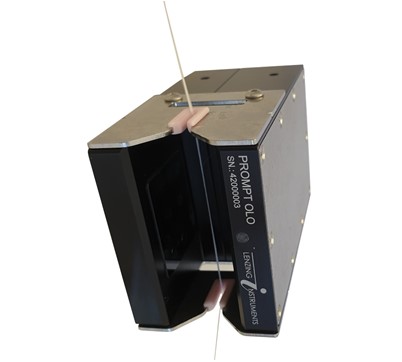
Wide application area
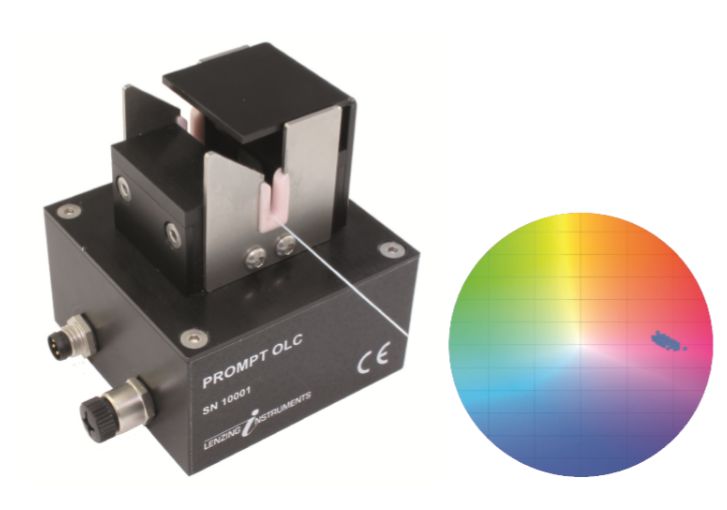
PROMPT OLO monitors multifilament yarn for broken filaments, fluff, titer (dtex, den), interlace and twist. Monofilament yarn is monitored for thin and thick places as well as for diameter variations.
Thanks to the high detection sensitivity, PROMPT OLO even enables monitoring of very small defects and variations.
Easy fitting
The usage of PROMPT OLO is also possible where mounting space is scarce: In addition to the PROMPT OLO sensor with standard dimensions, there is also a choice of a sensor with smaller dimensions. Depending on the application, PROMPT OLO can be applied with or without yarn guides.
Flexible data management
Data communication is accomplished either via PC or via a PLC.
Comprehensive data evaluation
Customized settings for data evaluation are made easy in the PROMPT Visualize software.
Inspection method
Directly on the running yarn, in the production, filament yarn is guided through the processor controlled optical sensor. Defects or varying yarn parameters induce signal fluctuations. The signals are communicated to the PC for data evaluation. Typically applied for FDY, DTY, IY.
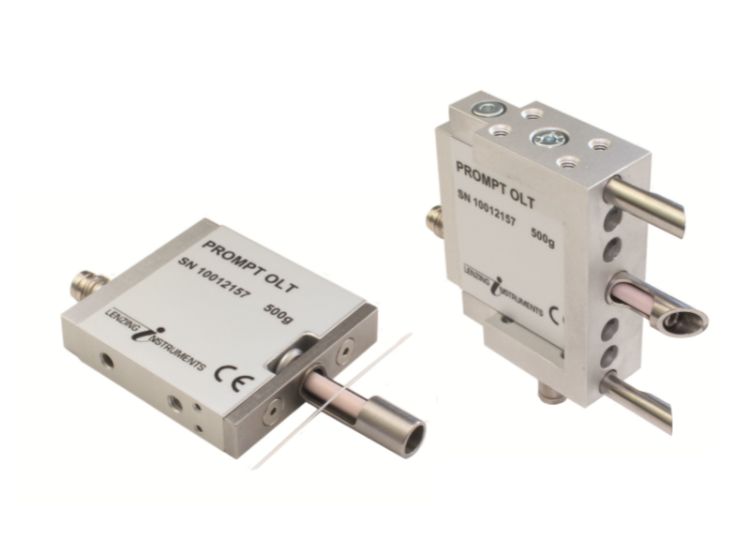
No calibration needed
The PROMPT OLT sensor does not require a full-scale calibration. The full-scale output is calibrated during production. The only calibration required is to tare or zero out any “no load” offset.
Very high sampling rates
PROMPT OLT enables sampling rates of up to 1 MHz and at the same time less noise in comparison to traditional strain gauge tension sensors.
Easy integration in production process
The position of the yarn is of no relevance for reliable results. Additionally, a splash guard protects the sensor against finish and cleaning agents. An optional air pressure module with cooling Test principle protects the sensor from dust, dirt and humidity variations. The cooling Test principle reduces the thermal sensitivity of the sensor. This makes integration of the PROMPT OLT sensor in the production process easy.
Inspection method
PROMPT OLT measures the absolute tension on the yarn by means of a strain gauge transducer.
The generated electrical signals are processed and evaluated for real time feedback about tension variations. For analysis of quench air issues, PROMPT OLT is normally installed before the 1st godet.
For analysis of winder issues, PROMPT OLT is normally installed before the winder.
Typically applied for FDY, TY, IY.
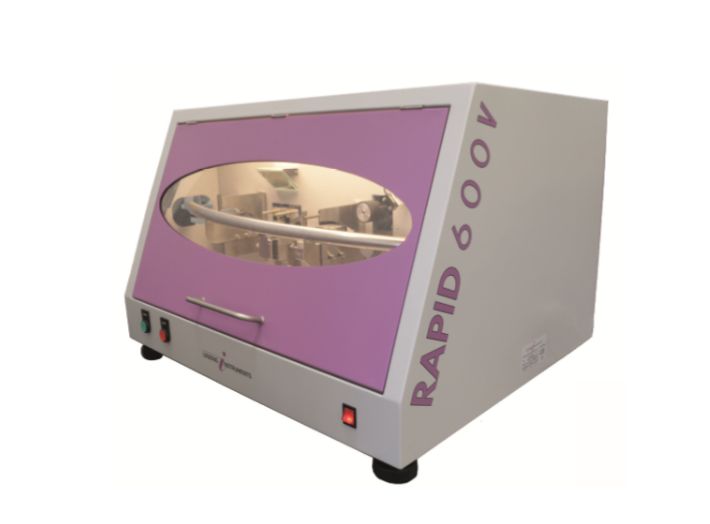
At-line application
The interlace tester RAPID 600 is placed directly in the production, close to the spinning position. This together with the high-speed testing test principle means timely reactions to minor quality, hence less downgraded material with cost savings as a result. In comparison to other measurement test principles, RAPID 600 V features a continuous running test and there is no need to stop the yarn at detected nodes.
Detection of weak nodes
During the measurement with RAPID 600 V, a force sensor determines the strength of each detected node. Accordingly, detected nodes are classified as good nodes or weak nodes, i.e. the quality of detected nodes are automatically analyzed.
Easy results evaluation
Intuitive and easy analysis of measurement results. Thorough problem analysis with special key figures: No need for expert personnel.
Highly automated handling
RAPID 600 V features automatic yarn string-up, measurement and sample removal. An even higher automatization degree can be achieved if RAPID 600 V is used together with the optional SESS Sequential End Sampling System: With SESS, up to 24 positions are handled centrally and automatically for efficient sample feeding without any need for operator interference.
Test method
A vertically moving needle is periodically inserted into the passing yarn. The measurement gives feedback about the absolute number of interlaced nodes, node distance and their strength according to the applied ASTM standard (“good node or weak node”) as well as the absolute maximum distance between the detected interlaced nodes. Typically used for POY, FDY or DTY. Standardized according to ASTM D 4724.

Objective sampling
No operator influence means objective sampling without any human influence on the sampling procedure. Additionally, the collected samples represent the daily production of quality correctly, i.e. ROFIS enables higher statistical validity of the sampling procedure.
Time saving
The automatic sampling procedure leaves the operator free capacities for other tasks.
Function
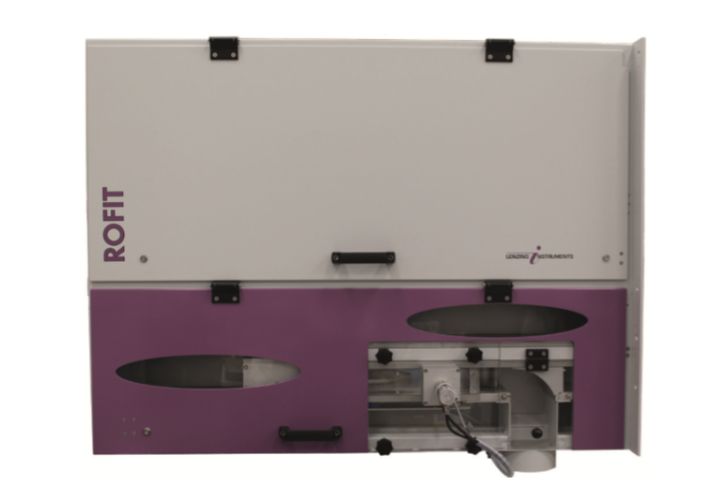
ROFIS enables automatic and controlled sampling of staple fibers from the filling chamber of the baling press. In the filling chamber above the baling press, a horizontally moving grabber grabs fibers of a defined sample size. A sample is collected at a frequence of up to six times per minute. The collected fiber sample is released via a sample outlet. Further handling by the customer could mean presenting a plastic bag to the fiber sampling chamber for proper packaging. Alternatively, the collected samples can be dropped into a fall tube down to the baling press level.

Objective sampling
No operator influence means objective sampling without any human influence on the sampling procedure. Additionally, the collected samples represent the daily production of quality correctly. ROFIT 200 enables higher statistical validity of the sampling procedure. The random sampling of fiber bundles out of the filling chamber guarantees for representative average whiteness measurements.
Time saving
The automatic sampling procedure leaves the operator free capacities for other tasks.
Test method
ROFIT 200 enables automatic and controlled sampling of staple fibers from the filling chamber of the baling press. In the filling chamber above the baling press, a horizontally moving grabber grabs fibers of a defined sample size. A sample is collected at a frequence of up to six times per minute. The collected fiber sample is released via a sample outlet. Further handling by the customer could mean presenting a plastic bag to the fiber sampling chamber for proper packaging. Alternatively, the collected samples can be dropped into a fall tube down to the baling press level. By means of a three filter measuring unit, ROFIT 200 also features semicontinuous measurement of whiteness, yellowness and fluorescence according to Berger and TAPPI. The output signals can be used for optional automatic control of the bleaching section.

Objective sampling
No operator influence means objective sampling without any human influence on the sampling procedure. Additionally, the collected samples represent the daily production of quality correctly. ROFIT 300 enables higher statistical validity of the sampling procedure. The random sampling of fiber bundles out of the filling chamber guarantees for representative average whiteness and moisture measurements.
Time saving
The automatic sampling procedure in combination with whiteness- and moisture control leaves the operator free capacities for other tasks.
Test method
ROFIT 300 enables automatic and controlled sampling of staple fibers from the filling chamber of the baling press. In the filling chamber above the baling press, a horizontally moving grabber grabs fibers of a defined sample size. A sample is collected at a frequence of up to six times per minute. The collected fiber sample is released via a sample outlet. Further handling by the customer could mean presenting a plastic bag to the fiber sampling chamber for proper packaging. Alternatively, the collected samples can be dropped into a fall tube down to the baling press level. By means of a three filter measuring unit, ROFIT 300 also features semicontinuous measurement of whiteness, yellowness and fluorescence according to Berger and TAPPI. Capacitive sensors control the samples for their moisture content. The output signals can be used for optional automatic control of the bleaching section respectively the drying section.
Objective sampling
No operator influence means objective sampling without any human influence on the sampling procedure. Additionally, the collected samples represent the daily production of quality correctly. ROFIT 400 enables higher statistical validity of the sampling procedure. The random sampling of fiber bundles out of the filling chamber guarantees for representative moisture measurements.
Time saving
The automatic sampling in combination with moisture control leaves the operator free capacities for other tasks.
Test method
ROFIT 400 enables automatic and controlled sampling of staple fibers from the filling chamber of the baling press. In the filling chamber above the baling press, a horizontally moving grabber grabs fibers of a defined sample size. A sample is collected at a frequence of up to six times per minute. The collected fiber sample is released via a sample outlet. Further handling by the customer could mean presenting a plastic bag to the fiber sampling chamber for proper packaging. Alternatively, the collected samples can be dropped into a fall tube down to the baling press level. By means of a three filter measuring unit, ROFIT 300 also features semicontinuous measurement of capacitive sensors, ROFIT 400 controls the samples for their moisture content. The output signals can be used for optional automatic control of the drying section.
Objective measurement
The reduced human impact means reproducible and reliable test results.
Flexible testing
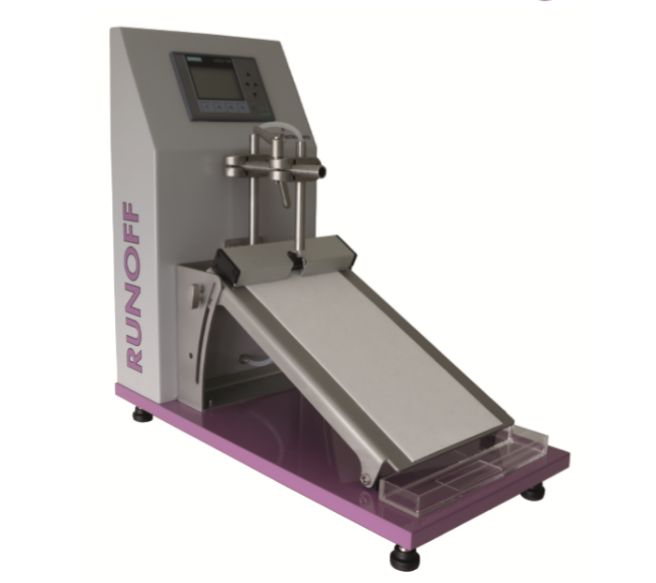
With RUNOFF, test parameters such as slope angle, dosing volume and liquid discharge time can be individually adjusted. The Test principle of RUNOFF enables the runoff test to be performed either as a basic test or as a repeated test, according to the specifications of INDA/EDANA.
Cost savings
A collecting container is used for collection of the run-off liquid instead of a receiver pad. This means less need for consumables and therewith cost savings.
Test method
A specified quantity of test liquid (simulated urine) is automatically discharged at a constant rate onto the test specimen, which is positioned on an inclined plane. After the test liquid has penetrated into the absorbent medium underneath the test specimen, the non-absorbed run-off liquid is discharged into the collecting tray; the operator weighs the tray and notes the run-off value.
Standardized according to INDA/EDANA WSP 80.9.
LISTER AC, LISTER LC, LISTER AUTO and WETBACK are further testing instruments, which assist you in optimizing the liquid management of your products.
Efficient quality control
Labour- and time savings: A high number of bobbins/packages can be tested for draw tension/draw elongation, titer/titer variation and/or interlaced knots/entanglements shortly after completed production. The fully automatic testing- and sample feeding procedure eliminates the need for any assistance of the operator, who is free to carry out other tasks.
Fast reactions to quality deviations
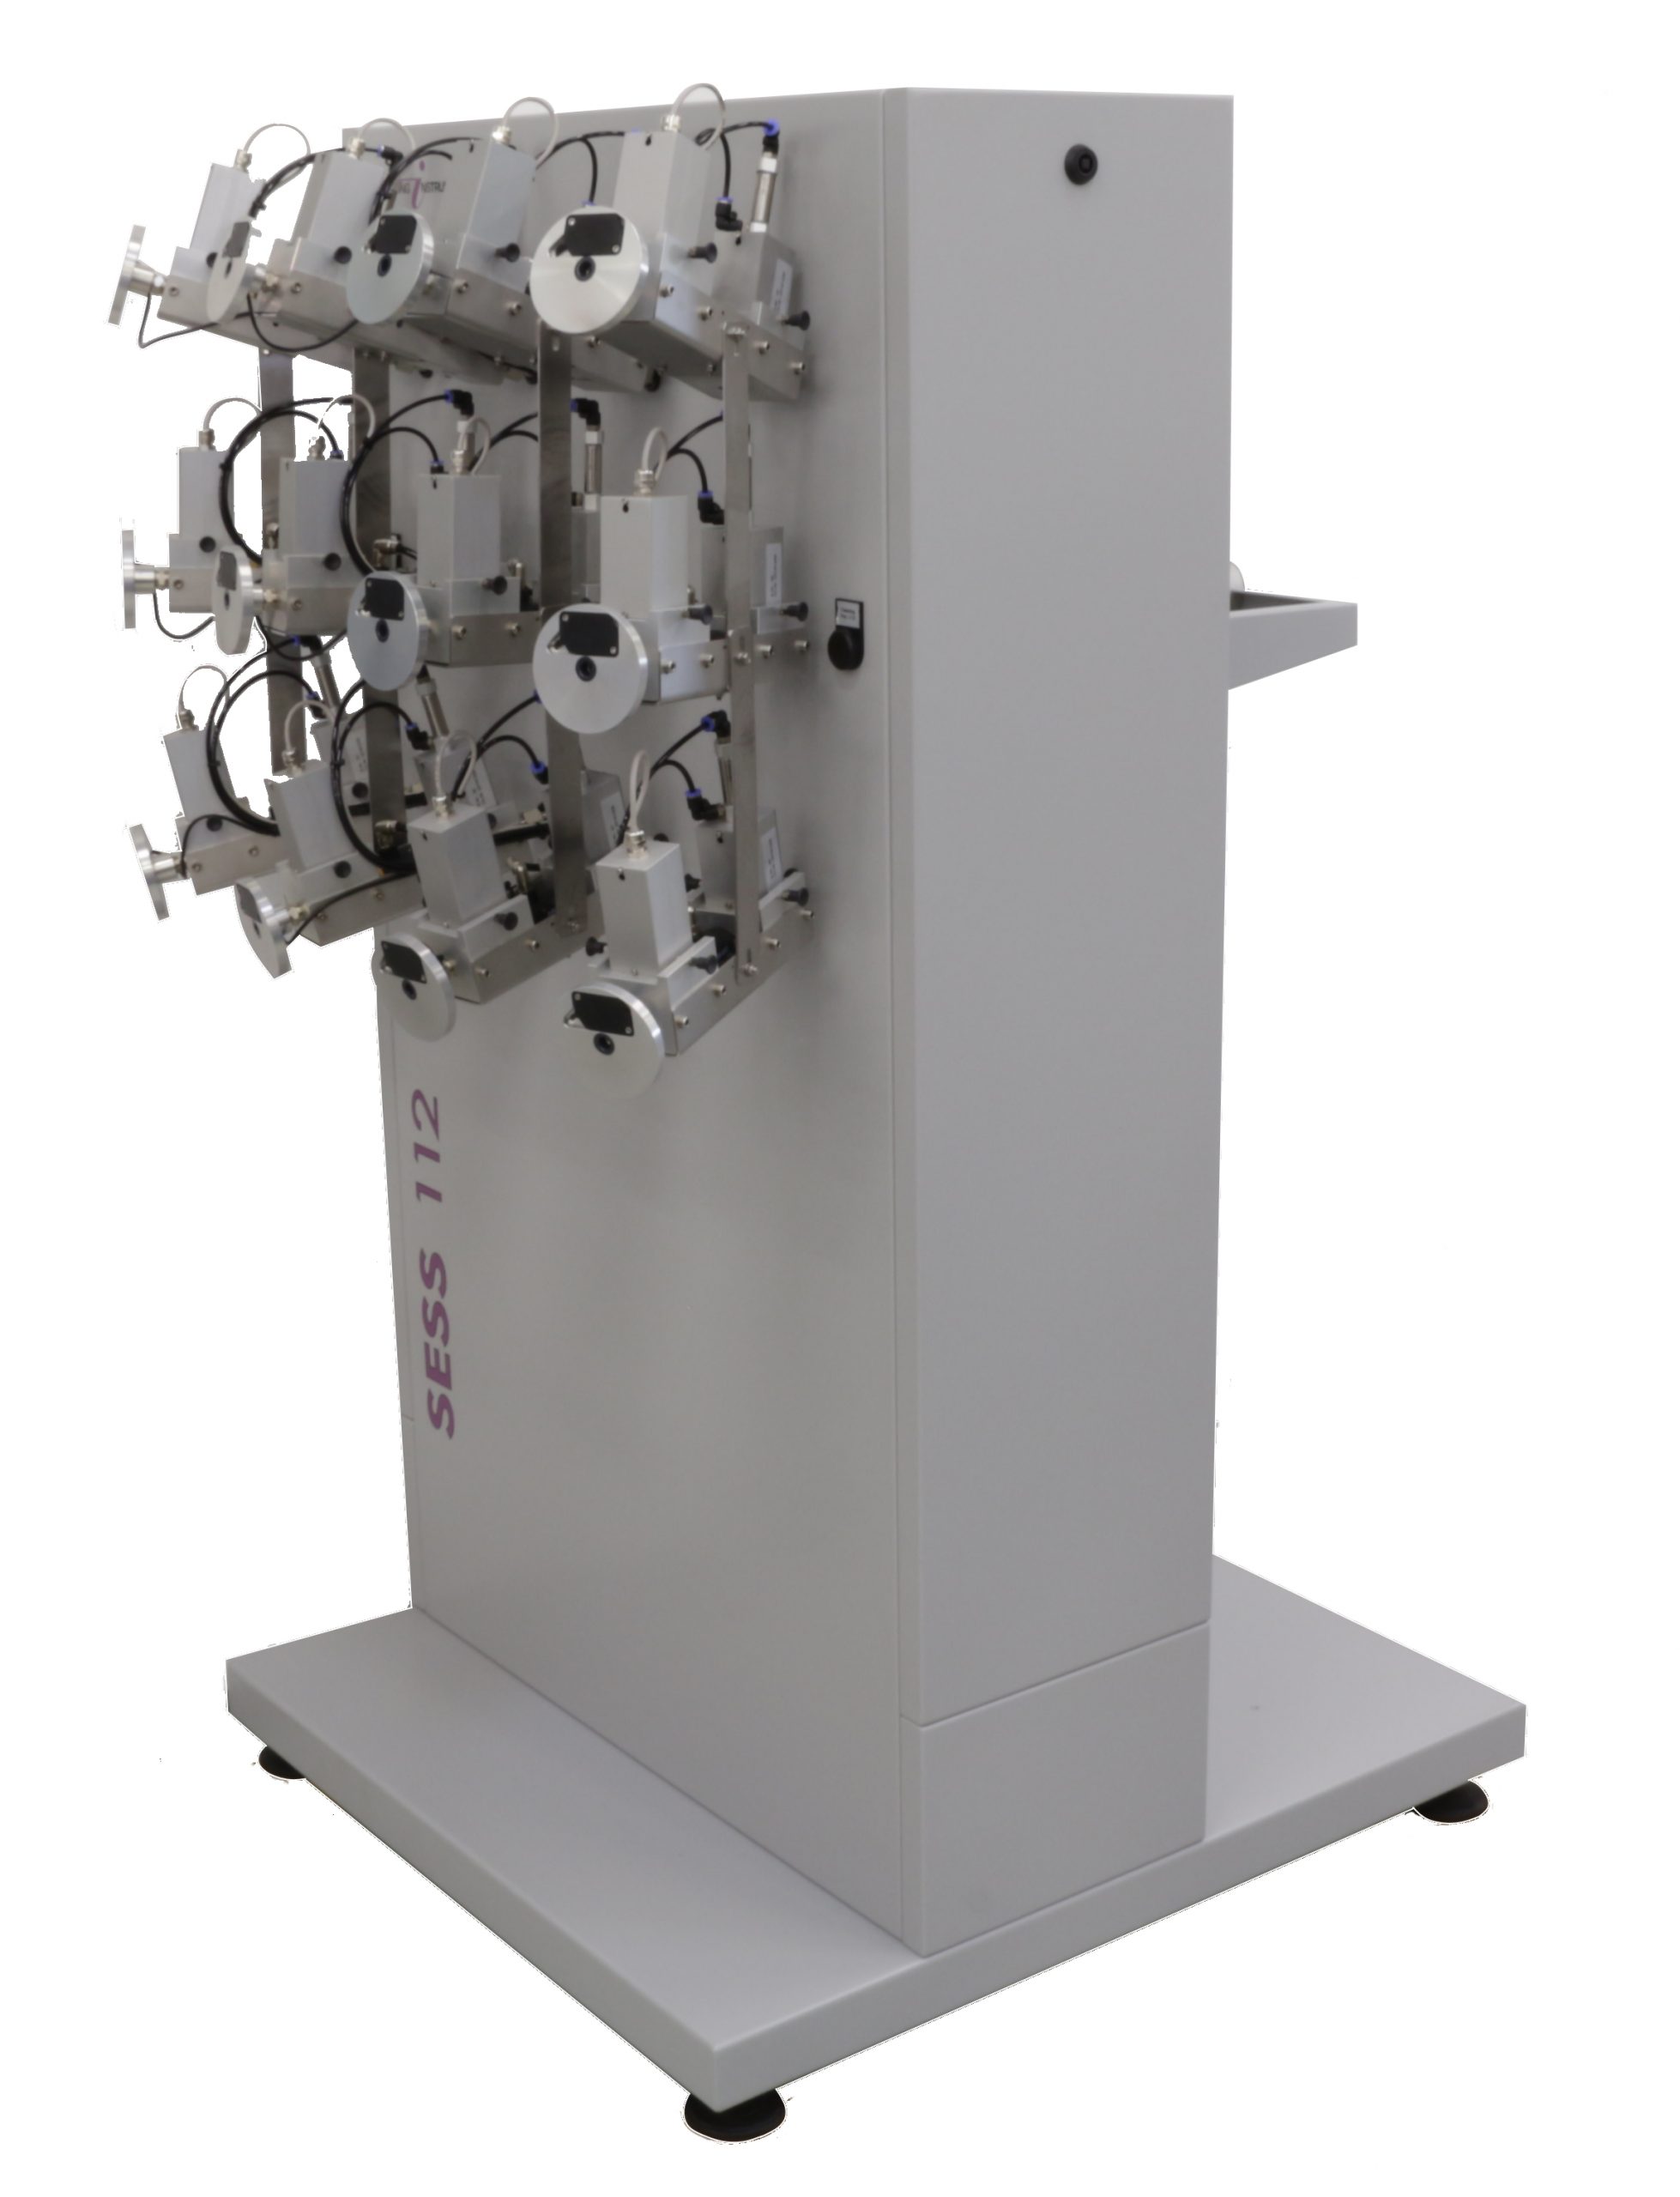
SESS and the connected instruments are positioned at-line in the production; hence the bobbins can be controlled for their quality directly after completed production. This enables prompt reactions to any deviations from set quality levels.
Flexible integration
SESS is designed for flexible integration in all levels of transport systems and automation.
Function
The SESS Sequential End Sampling System facilitates sample feeding to Lenzing Instruments’ high volume testing instruments ACW 600/DVA, DTI 600 and/or RAPID 600 V. SESS can be combined with one or two of the testing instruments and up to 24 bobbins are managed fully automatically by the system. All yarn ends from a shuttle, buggy or creel positioned in front of SESS are subsequently guided and fed to the connected instruments on a pneumatic air stream. The measurement of the yarn ends on the selected testing instrument is accomplished fully automatically according to a pre-set schedule. Generated measurement results are presented on the connected testing instrument.
Automatic testing
After sample preparation, the test is performed fully automatically. The automatic and standardized test procedure guarantees for objective test results with high reproducibility.
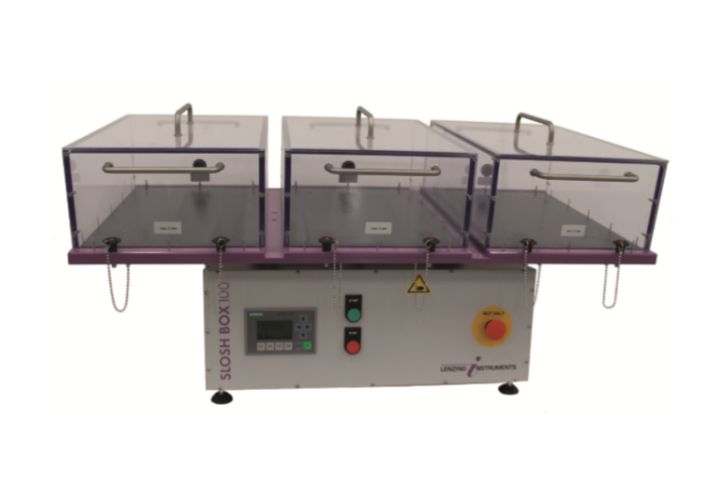
Up to three samples of nonwovens may be tested simultaneously during one and the same test run.
Easy operation
SLOSH BOX 100 features easy and ergonomic handling.
Test method
The Sloshbox Disintegration Test simulates the behaviour of a nonwoven product in a gravity sewer. The objection is to analyse the potential for a product to disintegrate when it is subjected to mechanical agitation in water. During the test procedure with SLOSH BOX 100, the water-surrounded nonwoven sample is exposed to mechanical oscillations for a time period of one hour. After the test, the size of the residual fragments provides information about the flushability of the material. A standard analysis sieve is included.
SLOSH BOX 100 performs the Slosbox Disintegration Test according to FG502 of INDA/EDANA guidance document for assessing the flushability of nonwovens.
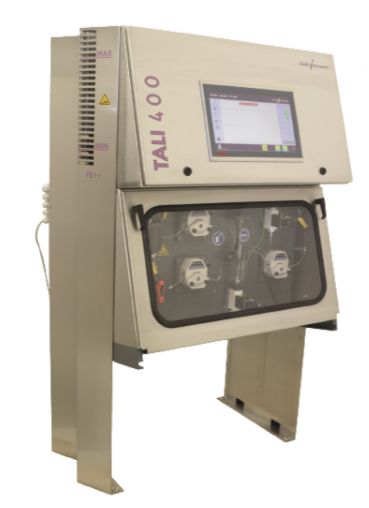
Enhanced fiber quality
By integrating TALI 400 B in a closed control loop, fully automatic dosing of chemicals is possible. The automatic dosing guarantees for constant bleaching bath concentration. Constant production conditions mean constant quality in terms of elongation, crimp etc.
Cost savings
The controlled bleaching bath concentration enables optimised consumption of chemicals and the associated cost savings.
Test method
The monitoring of concentration variations in the bleaching bath is based on the principle of acid-base titration. An alkaline solution is added to the acid solution by means of titration until the pH value rapidly changes from a low to a high pH value. The rapid change in pH value indicates that the equivalence point has been reached between the acid and the alkaline solution. This allows for calculation of the concentrations of NaOCl.

Enhanced fiber quality
By integrating TALI 400 S in a closed control loop, fully automatic dosing of chemicals is possible. The automatic dosing guarantees for constant spin bath concentration. Constant production conditions mean constant quality in terms of elongation, crimp etc.
Cost savings
The controlled spin bath concentration enables optimised consumption of chemicals and the associated cost savings.
Test method
The monitoring of concentration variations in the spin bath is based on the principle of acid-base titration. An alkaline solution is added to the acid solution by means of titration until the pH value rapidly changes from a low to a high pH value. The rapid change in pH value indicates that the equivalence point has been reached between the acid and the alkaline solution. This allows for calculation of the concentrations of H2SO4 and ZnSO4. An external density measurement system (optional) also allows for calculation of the Na2SO4 concentration.
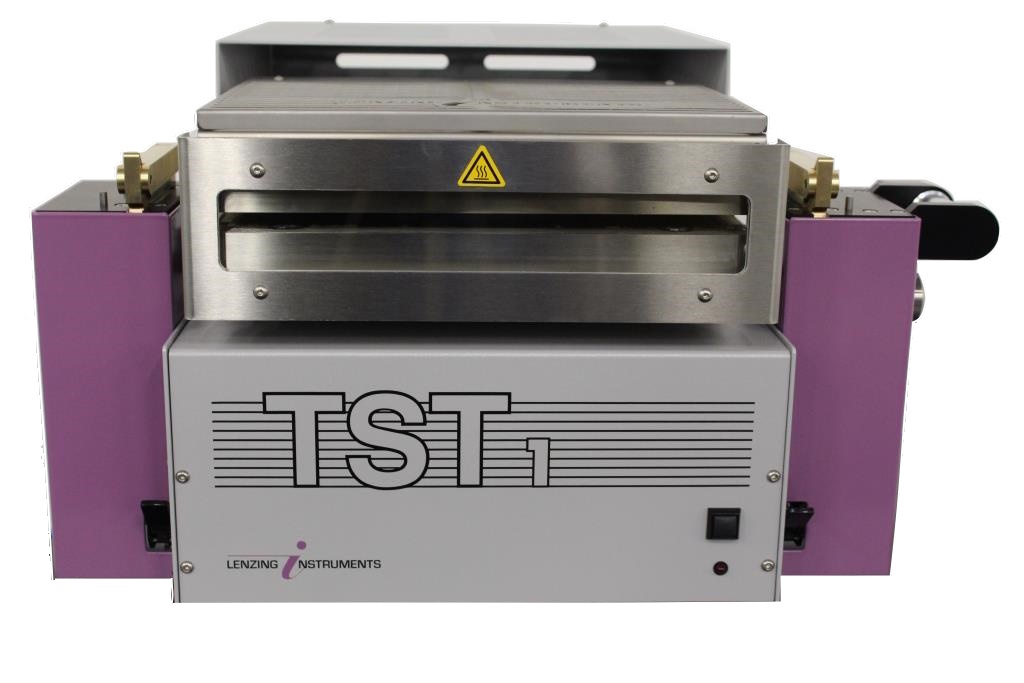
Multiple purpose testing
Use TST 1 for standardized quality control or for advanced material research and development. The extensive software program allows for individual settings of temperature and time as well as for individually programmable test cycles to meet your testing objectives.
Objective measurement
A fully automated measurement procedure guarantees for unbiased thermal shrinkage measurements with no human impact on the test results.
Easy analysis at a glance
During the measurement, the impact of the heat on the tested material can be observed both graphically and numerically in real-time. After completed measurement, the generated report offers all data for detailed analysis.
Test method
The Thermal Shrinkage Tester TST 1 tests the impact of hot air on wider samples and tapes made of synthetic film, nonwoven materials, laminated products and fabrics. Product details and test parameters are entered in the software program. The sample is prepared and pre-tensioned by means of clamping pretension weights onto the sample end. By a mouse click or by pressing the instrument button, the measurement is started and performed according to the selected test parameters. The oven-type heater automatically moves to cover the sample, which are heated by hot air to the pre-set temperature. After completed heating period, the oven automatically uncovers the sample to finish the measurement or to start a measurement of the residual shrinkage properties of the tested material depending on entered specifications. Standardized according to ISO 14616 and DIN 53369.
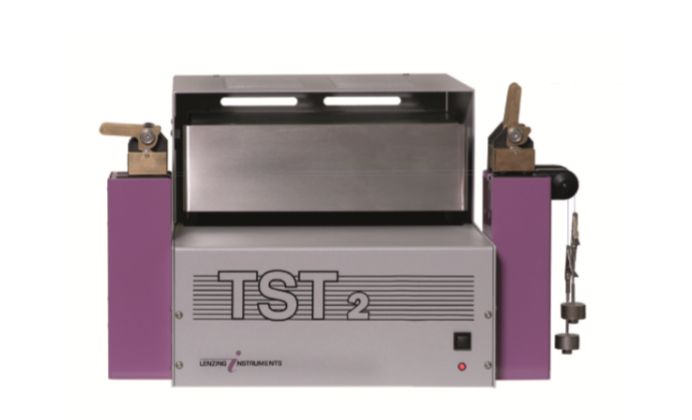
Testing of two yarn samples in one and the same test run. Combine testing of shrinkage % and shrinkage force (one yarn sample each) or test either two samples for % shrinkage or two samples for shrinkage force.
Use TST 2 for standardized quality control or for advanced material research and development. The extensive software program allows for individual settings of temperature and time as well as for individually programmable test cycles to meet your testing objectives.
A fully automated measurement procedure guarantees for unbiased thermal shrinkage measurements with no human impact on the test results.
During the measurement, the impact of the heat on the tested material can be observed both graphically and numerically in real-time. After completed measurement, the generated report offers all data for detailed analysis.
For yarns of higher titer (dtex/den), TST HD is the choice. TST 2 HD is especially designed to withstand the higher forces developed in coarse yarns during the shrinkage force test.
The Thermal Shrinkage Tester tests the impact of hot air on industrial and technical filament yarn such as tyre cord. Product details and test parameters are entered in the software program. Samples are prepared and pre-tensioned by means of clamping pretension weights onto the yarn ends. By a mouse click or by pressing the instrument button, the measurement is started and performed according to the selected test parameters. The oven-type heater automatically moves to cover the samples, which are heated by hot air to the pre-set temperature. After completed heating period, the oven automatically uncovers the samples to finish the measurement or to start a measurement of the residual shrinkage properties of the filament depending on entered specifications. Standardized according to ASTM D4974, ASTM D5591 and EN 13844.
See also TST 510/250 for high volume shrinkage testing.
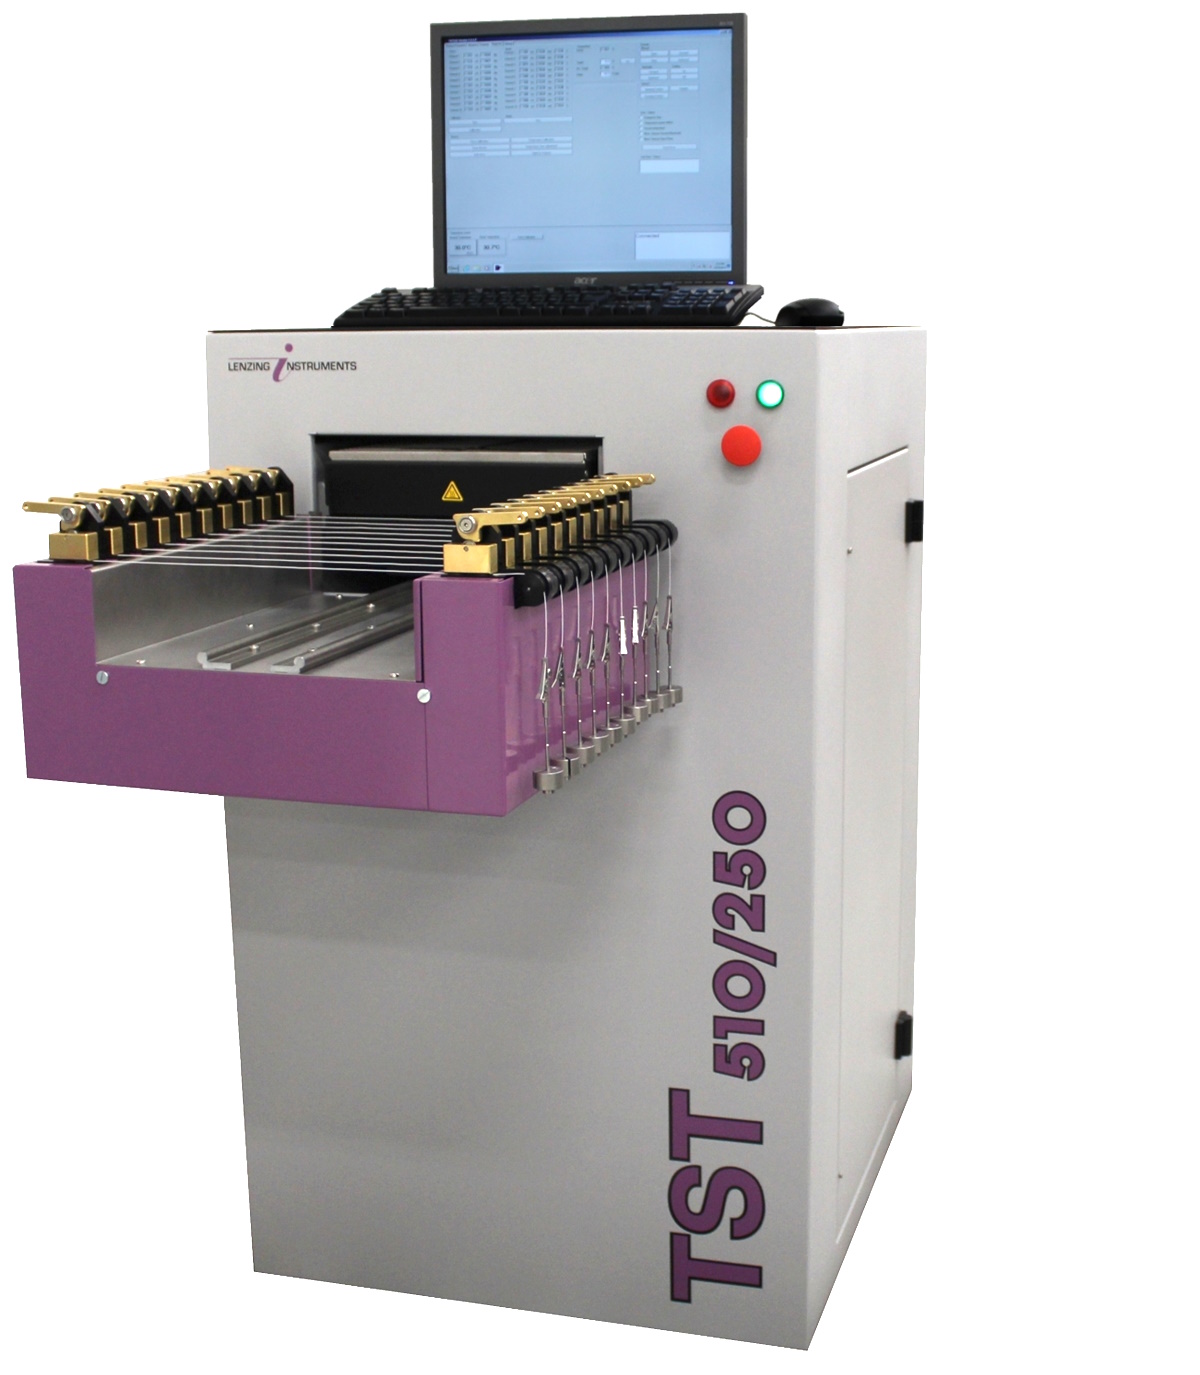
Highly efficient testing
Testing of up to ten yarn samples in one and the same test run. Combine testing of shrinkage % and shrinkage force (number of samples individually selectable) or test either up to ten samples for % shrinkage or up to ten samples for shrinkage force.
Testing for multiple purposes
Use TST 510/250 for standardized quality control or for advanced material research and development. The extensive software program allows for individual settings of temperature and time as well as for individually programmable test cycles to meet your testing objectives.
Objective measurement
A fully automated measurement procedure guarantees for unbiased thermal shrinkage measurements with no human impact on the test results.
Easy analysis at a glance
During the measurement, the impact of the heat on the tested material can be observed both graphically and numerically in real-time. After completed measurement, the generated report offers all data for detailed analysis.
Test method
The Thermal Shrinkage Tester tests the impact of hot air on industrial and technical filament yarn such as tire cord. Product details and test parameters are entered in the software program. Samples are prepared and pre-tensioned by means of clamping pretension weights onto the yarn ends. By a mouse click or by pressing the instrument button, the measurement is started and performed according to the selected test parameters. The oven-type heater automatically moves to cover the samples, which are heated by hot air to the pre-set temperature. After completed heating period, the oven automatically uncovers the samples to finish the measurement or to start a measurement of the residual shrinkage properties of the filament depending on entered specifications. Standardized according to ASTM D4974, ASTM D5591 and EN 13844.
For testing of smaller quantites, TST 2 may be the choice for you.
For wider samples up to 50 mm width, we recommend TST 1.
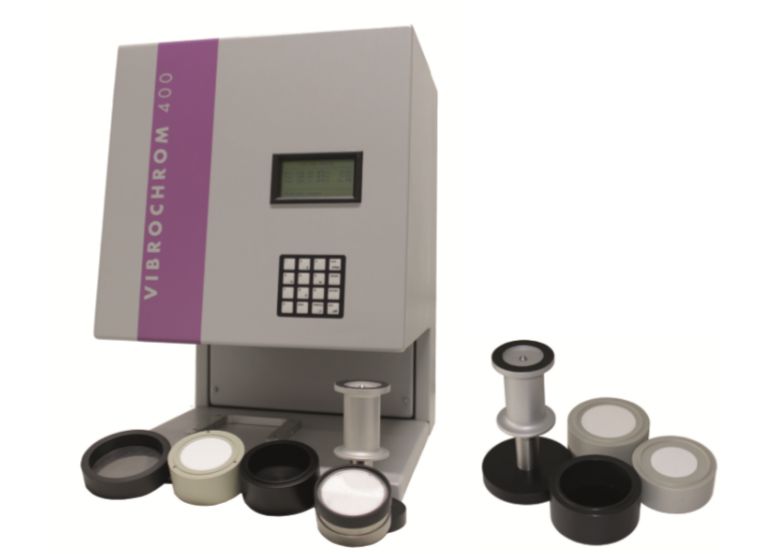
Versatile illumination
Applied illumination is a CIE standard source D65 flashlight. Optionally, VIBROCHROM 400 can be equipped with a second flashlight emitting ultraviolet light for determination of fluorescence.
Easy handling
With VIBROCHROM 400, production control for colour- and whiteness is made easy: The instrument features robust design and both calibration and operation have been facilitated to include just a few steps. Accuracy and reproducibility of measurement results are ensured by the automatic and objective measurement procedure. The special design enables highest reproducibility even with difficult sample surfaces.
Vast evaluation possibilities
The VM 400 software program and database offer individual settings for presentation of measurement results and statistics.
Test method
VIBROCHROM 400 automatically determines the tristimulus values of a specimen under standard illumination. It features three complete optical systems with colour filters each for measuring and reference channel and is, therefore, a dual-beam photometer. Applied measurement geometry: d/8°. The sample is illuminated by flashlights and the reflection is measured and evaluated.
VIBROCHROM 400 is typically used for staple fiber, filament, granules, powder etc. for whiteness, yellowness and fluorescence. Standardized according to ISO 2469 and DIN 5033.
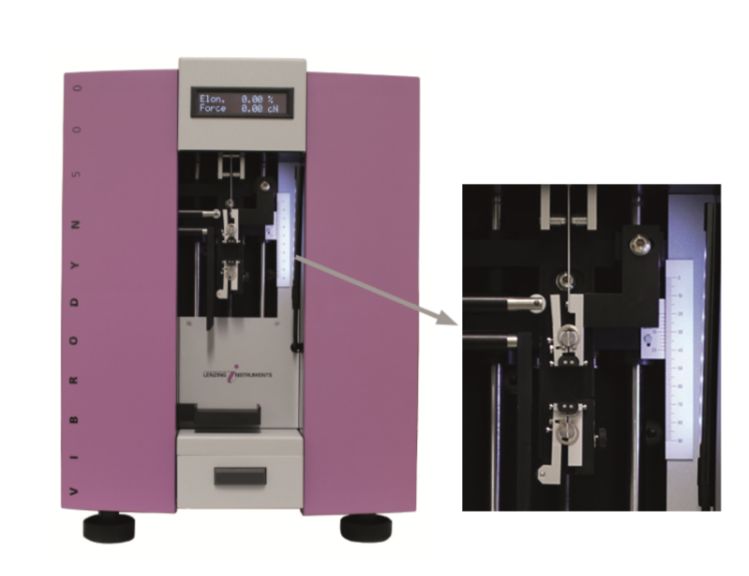
Versatile application
VIBRODYN 500 is used for tenacity- and elongation testing of all kinds of fibers.
The availability of easily exchangeable clamps guarantees for optimum quality control of any material. Continuous monitoring of the measurement progress makes VIBRODYN 500 a perfect tool for research, education etc. Optionally, VIBRODYN 500 can be equipped with a device for automatic testing of fibers in the wet state for determination of the BISFA wet modulus. VIBRODYN 500 also offers the options of a cycle test as well as a software Test principle for evaluation of characteristic features of partially oriented polyester fiber and filament, NDR.
Easy handling
VIBRODYN 500 is “one-button-operated”, i.e. the operator just has to clamp the fiber and then press a button to start the measurement. Optimization of reproducibility and accuracy is achieved by the elimination of any human impact on the measurement.
Quick feedback
Test results availability within seconds for quick reactions to quality levels and possible deviations from set quality levels.
Test method
A fiber is clamped between two clamps by electromagnetic force. The top clamp is connected with the force measuring device and the bottom clamp moves until fiber rupture at constant rate of elongation (CRE). If VIBRODYN 500 is used in combination with VIBROSKOP 500 for titer (dtex, den) determination, the titer of the tested fibers will automatically be communicated to VIBRODYN 500 via a connected evaluation unit to be factored in the evaluation according to DIN 53816. The titer may also be entered directly via the integrated touch screen. Options for display of measurement results include digital display directly on the instrument and via a connected evaluation unit. Standardized according to DIN 53816, DIN EN ISO 5079, ASTM D 3822, BISFA, AFNOR G 07-008.
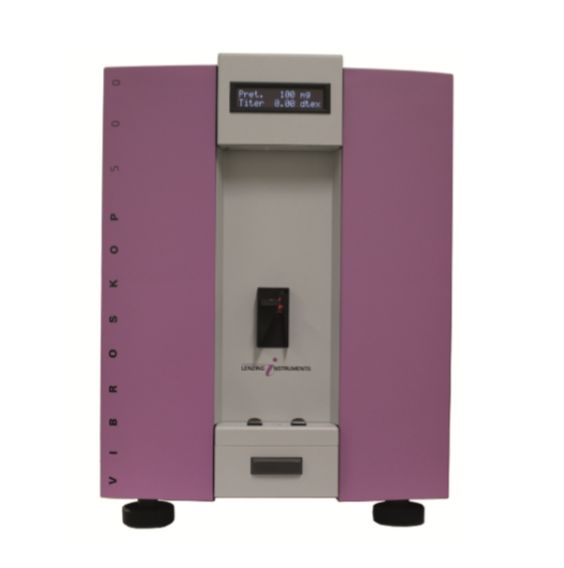
Versatile application
VIBROSKOP 500 is suitable for titer determination of all kinds of fibers.
Easy handling
VIBROSKOP 500 is “one-button-operated”, i.e. the operator just has to clamp the fiber and then press a button to start the measurement. Optimization of reproducibility and accuracy is achieved by the elimination of any human impact on the measurement. VIBROSKOP 500 features an outstanding accuracy, which surpasses the standard specifications.
Quick feedback
Test results availability within seconds for quick reactions to quality levels and possible deviations from set quality levels.
Test method
A pre-tensioned fiber is set into its natural vibration at constant length by an electronic delta impulse. The titer can be derived from the fiber’s vibration frequency and is automatically calculated, thereby allowing for the applied pre-tension weight. Options for display of measurement results include digital display directly on the instrument and via a connected evaluation unit.
Standardized according to BISFA, ASTM D1577, DIN 53812.
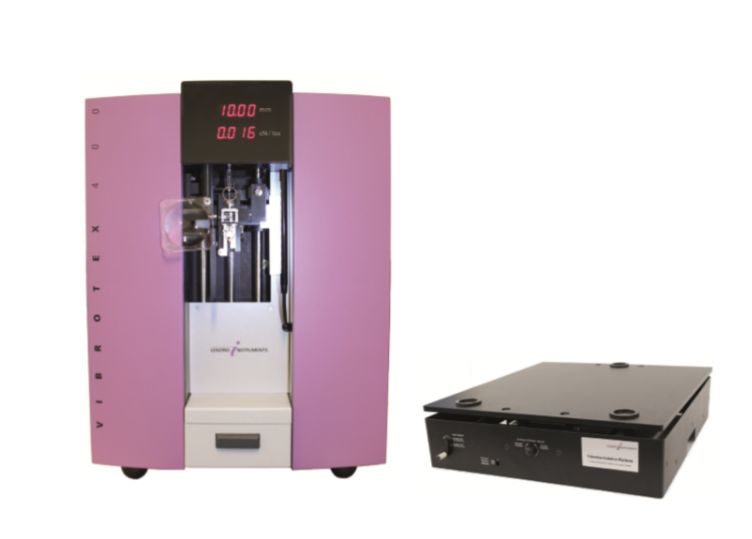
Versatile application
VIBROTEX 400 offers thorough analysis of the crimp properties of single fibers for production quality control, for research- and development as well as for educational purposes.
Long-time experience
The applied technology is based on many years of research conducted within Lenzing AG.
Therewith, VIBROTEX 400 meets all requirements of fiber producers for accurate, flexible and thorough analysis of the crimp characteristics of staple fiber.
Quick feedback
Test results availability within seconds for quick reactions to quality levels and possible deviations from set quality levels.
Test method
Electromagnetic clamps fix the pre-tensioned fiber at top and bottom. The fiber is automatically drawn to carefully remove the crimp to a predefined extent. After the fiber has been straightened to the predefined trip level, the bottom clamp changes direction towards relaxation of the fiber. This means that the crimp removal is stopped before the crimp is pulled out completely. The applied algorithm allows for extrapolation up to the standard crimp removal of 1 cN/tex. For handling purposes, pretension is accomplished by means of paper weights. The usage of light paper weights for pretension prevents the crimp properties from being affected by the pretensioning. Years of profound research has proven that the applied tension limits of the measurement procedure do not influence the crimp during the test.
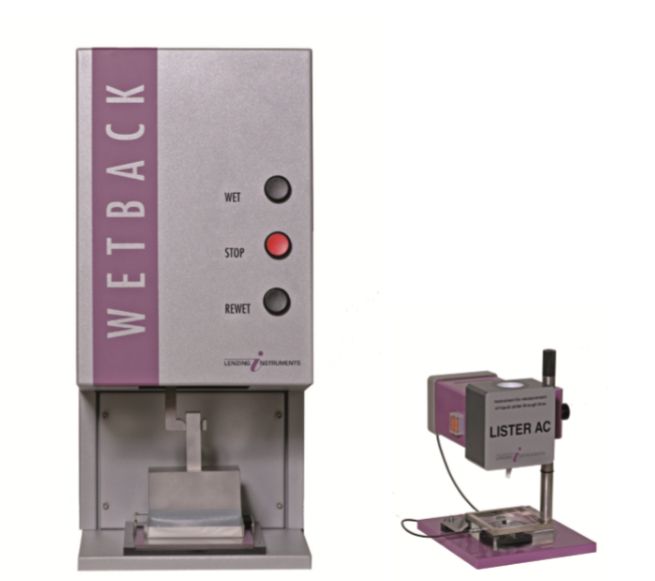
Standardized determination of the rewet/wetback properties of nonwoven coverstock/topsheet.
Highest reproducibility
The automated Test principle guarantees for objective, accurate and reproducible testing for reliable results.
Internationally acknowledged
WETBACK is standard setting when it comes to determination of the rewet/wetback properties of nonwovens. Hundreds of units are in use all over the world.
Standard setting
Lenzing Instruments is official partner of INDA/EDANA for the wetback measurement.
Supplier of filter paper
The needed standardized filter (blotter) paper can be acquired from Lenzing Instruments.
Test method
The WETBACK test is performed in connection with a liquid strike-through test with LISTER AC. Subsequently, a defined amount of liquid is applied on the prepared sample consisting of a nonwoven coverstock placed on top of a standard absorbent medium. Thereafter, the integrated simulated baby weight of WETBACK is automatically lowered onto the specimen. The lowering of the baby weight is accomplished with an by INDA/EDANA accurately defined speed. The weight remains on the sample for a specified period of time to ensure even spreading of the liquid. A pre-weighed special filter paper i.e. pick-up paper is then placed onto the nonwoven coverstock and the weight is again lowered onto the specimen. Consequently, by means of an electronic balance, the amount of liquid is determined, which, due to the load, is passed back through the specimen’s surface into the pick-up filter paper. The weight of the liquid absorbed by the pick-up paper is defined as wetback.
Standardized according to INDA/EDANA WSP 80.10.R3 (12.) and WSP 70.8.
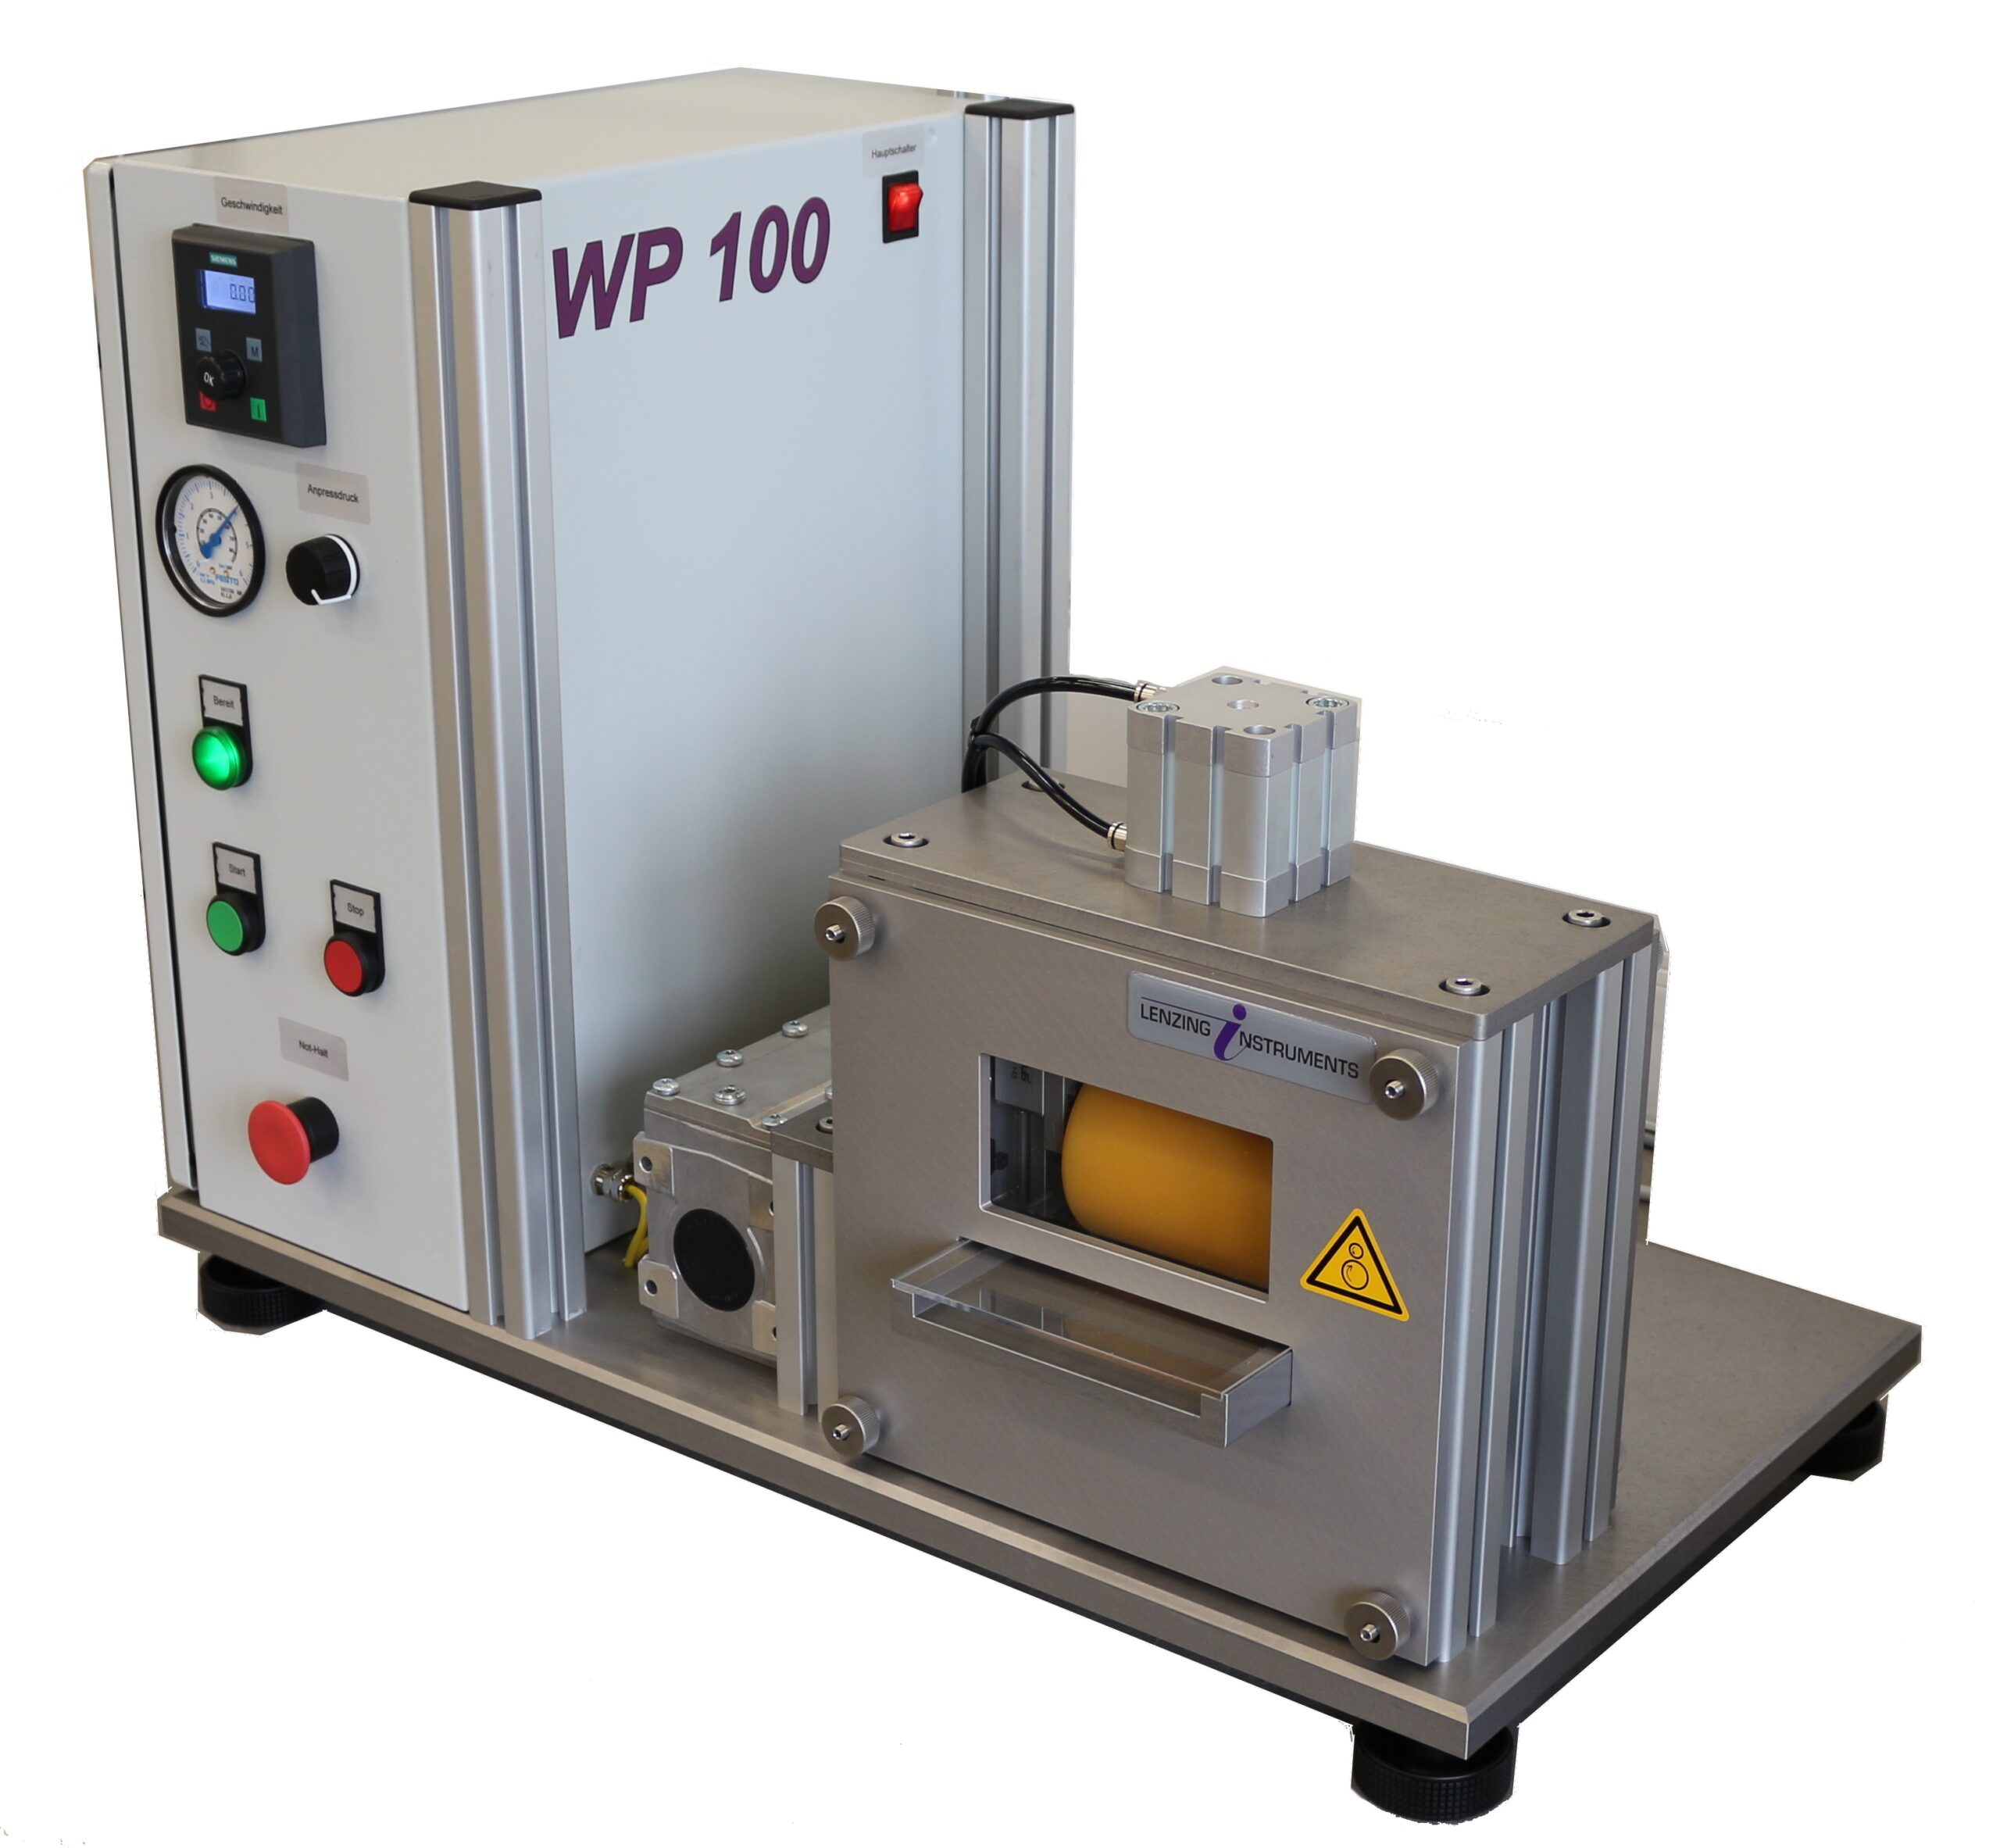
Reproducible film and foil analysis
The roller press WP 100 assists producers of synthetic film and foil in achieving highest reproducibility and repeatability of test results.
Uniform adhesion
Two rotating rollers and adjustable contact pressure enable attachment of adhesive strips at uniform contact pressure.
Adhesive force tests
WP 100 is ideally applied for analysis of vital material characteristics such as the adhesive force.
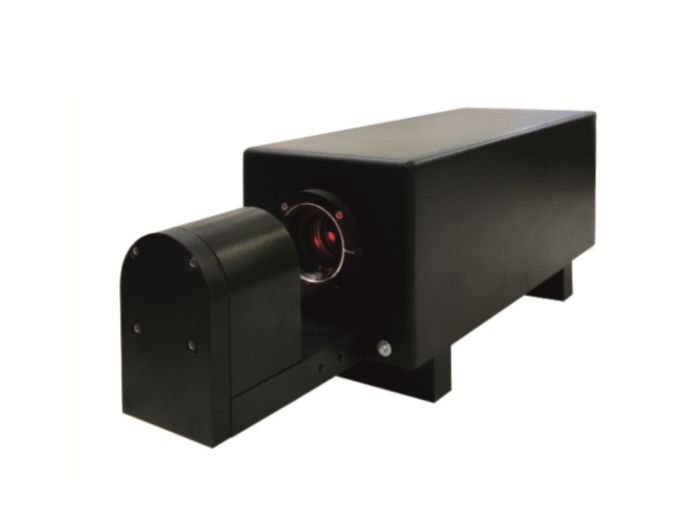
Thorough analysis
Monitored yarn characteristics and detected defects are reported in real time statistically and numerically together with the generated images. This enables detailed analysis and trouble shooting
Online or offline
YIS 200 can be applied either online, directly in the production, or offline in combination with a powerful yarn take-off unit – PROMPT LAB.
Flexible application
The application of YIS 200 is flexible and examples for use is for adjustment of installed online sensors, for process optimization as well as for research and development.
Inspection method
The Yarn Inspection System YIS 200 generates online real time feedback about the most decisive characteristics of filament yarn. Monitored yarn properties include interlace, diameter and evenness. Detected defects include thin- and thick places, evenness, broken filaments, fluff and yarn breaks The ultra-fast line scan camera scans the illuminated yarn online in different processes such as filament spinning, texturing, twisting, etc. The generated raw signals are evaluated by means of intelligent algorithms. Each time a defect e.g. broken filament, fluff, thin or thick place or a diameter change is detected, an image of the defect is generated. This allows for detailed analysis and troubleshooting. It also offers offline analysis based on stored real time data.
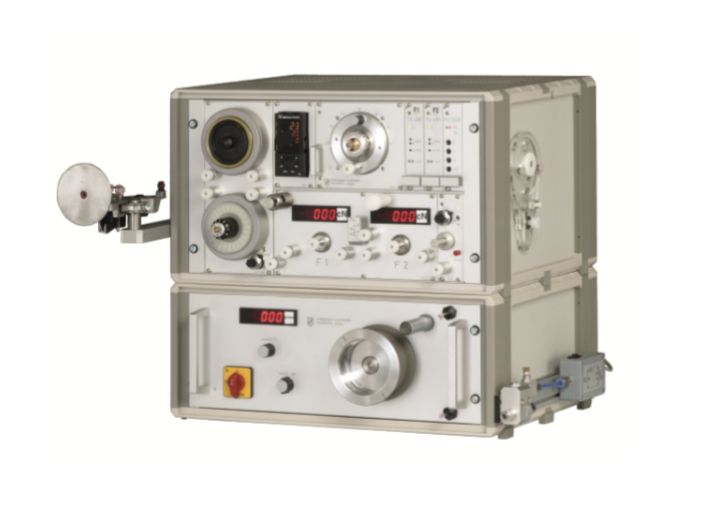
Versatile
A wide choice of friction bodies enables authentic simulation of various friction conditions.
Measurement options: yarn/ceramic, yarn/steel, yarn/glass, yarn/yarn.
Modular system
A modular system enables flexible friction testing for analysis of the impact on the friction properties depending on different process parameters. Available modules include a friction body heating device, a take-off device for stick-slip measurements, spin finish pump with preparation nozzle, accessories for yarn-to-yarn tests, accessories for friction tests with sewing thread, a thermo/hygrometer as well as a surface voltmeter.
Test method
The measurement unit incorporates the µ-meter, a filament yarn take-off device and a data collection and analysis system. By means of the yarn take-off unit, the yarn is guided over a friction body at a certain speed and a certain angle. The tensile force is measured before and behind the friction body and the friction coefficient can be calculated.